
Table of Contents
- Asbestos Testing for Home Renovation Projects: What You Need to Know
- When Is Asbestos Testing Required Before Renovation?
- Common Household Materials That May Contain Asbestos
- How Professional Asbestos Testing Works: Sample Collection and Lab Analysis
- DIY Asbestos Testing Kits: What Homeowners Should Know
- Asbestos Testing Cost: What Affects the Price
- Asbestos Abatement Regulations and What to Do If Asbestos Is Found
- Conclusion: Protecting Your Health and Investment During Renovation
- Frequently Asked Questions
Last Updated: October 7, 2026
Asbestos Testing for Home Renovation Projects: What You Need to Know
Asbestos testing is the process of collecting suspect material samples from a home and having an accredited lab confirm whether asbestos fibers are present.
Here is the uncomfortable truth most renovation guides skip: you cannot identify asbestos by looking at a material. Popcorn ceilings, floor tiles, and pipe wrap that look harmless can contain fibers that cause mesothelioma and asbestosis decades later.
Never assume a material is asbestos-free because of its color or age. The only reliable way to know is lab analysis of a physical sample. Guessing wrong during demolition can contaminate an entire floor of your home.
When Is Asbestos Testing Required Before Renovation?
Testing is required before any renovation that will disturb suspect materials in a home built before the mid-1980s. The trigger is disturbance, not the presence of asbestos alone. If you are pulling up floor tiles, cutting into drywall, or scraping a ceiling, you need to know what is in that material first.
Building Age and Renovation Scope
Age is the first filter. Homes built before 1980 carry the highest risk because asbestos was common in construction materials through the 1970s. Materials installed as late as the 1980s can still contain it. A common mistake is assuming a 1975 home is “probably fine” because a previous owner remodeled.
Scope matters just as much. A cosmetic repaint rarely disturbs asbestos. A full gut renovation almost always does.
- High-risk projects: kitchen and bathroom remodels, popcorn ceiling removal, floor tile removal, wall demolition
- Lower-risk projects: painting, replacing a faucet, adding a light fixture in an untouched wall
- Always test: any project that cuts, sands, or breaks suspect material
NESHAP Regulations and Demolition Permits
The National Emission Standards for Hazardous Air Pollutants, known as NESHAP, govern how asbestos is handled during renovation and demolition (the EPA).
Local permitting offices often require an asbestos survey before issuing a demolition permit. Skip that step and you risk fines, a stop-work order, or a contaminated site. For the full regulatory text, see the EPA asbestos NESHAP overview.
Common Household Materials That May Contain Asbestos
Asbestos hides in more places than most homeowners expect. These are the materials we find most often during pre-renovation surveys in older homes.
Popcorn Ceilings, Drywall Joint Compound, and Floor Tiles
Popcorn ceilings are the classic suspect. The textured coating applied from the 1950s through the 1980s frequently contained asbestos, and scraping one without testing is one of the most dangerous renovation mistakes.
Drywall joint compound is the quiet one: the mud used to seal seams in older homes often contained asbestos, so sanding a patched wall can release fibers.
Insulation, Mastic, and Other Hidden Asbestos-Containing Materials
Insulation is where asbestos gets genuinely hard to spot. Vermiculite attic insulation, pipe wrap, and boiler insulation are common asbestos-containing materials, or ACM.
The distinction between friable and non-friable matters here. Friable materials crumble easily and release fibers with light contact. Non-friable materials, like intact floor tiles, hold together until you cut or sand them.
Before any renovation, walk the space and photograph every suspect material: textured ceilings, tiled floors, pipe wrap, and patched drywall. A labeled photo set helps your inspector plan sampling and gives you a record for permits and insurance.
How Professional Asbestos Testing Works: Sample Collection and Lab Analysis
Professional testing follows a defined chain: a certified asbestos inspector collects bulk samples, an accredited laboratory analyzes them, and you receive a written report, usually within a few days.
Bulk Sampling and Accredited Laboratory Testing
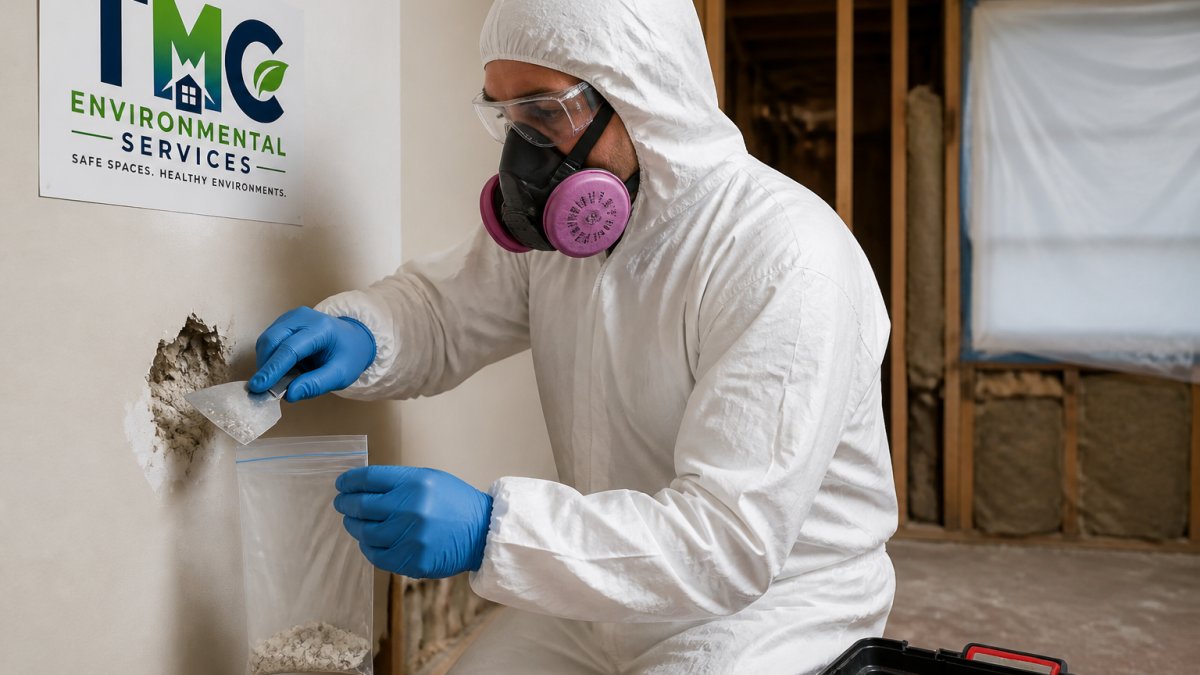
Bulk sampling is the collection of small physical pieces of suspect material for lab analysis. A certified inspector wears respiratory protection and follows safety protocols to avoid releasing fibers while cutting, then seals, labels, and ships each sample to an accredited laboratory.
At the lab, technicians use polarized light microscopy, and sometimes electron microscopy, to identify asbestos fibers and estimate their percentage. The report tells you which materials contain asbestos, what type, and how much.
DIY Asbestos Testing Kits: What Homeowners Should Know
DIY asbestos testing kits let you mail a sample to a lab yourself. The kits are legal, and the lab analysis can be accurate.
Collecting a sample means disturbing the material, the exact moment fibers become airborne.
Here is how the two paths compare:
| Factor | DIY Kit | Professional Inspection |
|---|---|---|
| Sample collection | You collect, risk of fiber release | Certified inspector with safety protocols |
| Lab analysis | Accredited lab, mail-in | Accredited lab, documented chain of custody |
| Written report | Basic result | Full report usable for permits and insurance |
| Hidden materials | Easy to miss | Full survey of suspect areas |
| Best for | One isolated, low-risk material | Any renovation, demolition, or dispute |
For a single loose tile in a garage, a kit may be enough. For a renovation, a professional survey is the safer call.
Asbestos Testing Cost: What Affects the Price
Most renovation guides dodge the money question entirely, leaving homeowners guessing whether asbestos testing is a $150 errand or a $2,000 line item. The honest answer: it depends on who does the work and how many samples the job requires, and the two cost structures are very different.
Lab Fees vs. Inspector Fees
There are two separate costs in almost every asbestos testing job, and conflating them is the most common budgeting mistake.
- Laboratory analysis fee: What the accredited lab charges to run a bulk sample through polarized light microscopy (PLM). Labs price per sample, with a lower rate for standard turnaround (several business days) and a higher rate for rush results (24-48 hours).
- Inspector or consultant fee: The labor to visit your home, identify suspect materials, collect samples safely, and write the report. Inspectors usually charge a base visit or mobilization fee plus a per-sample charge, or an hourly rate for larger surveys.
A DIY mail-in kit collapses these into one price, you pay the lab directly and skip the inspector, but you also take on the sampling risk described above.
What Drives the Total
- Sample count: The single biggest variable. One suspect material might need one or two samples; a whole-home pre-demolition survey can run 15 to 30 because NESHAP and good practice call for sampling each distinct homogeneous material, often at multiple locations.
- Accessibility: Materials behind finished walls, in crawl spaces, or inside mechanical chases take longer to reach and sample, pushing labor cost up.
- Turnaround time: Rush lab results cost more than standard. If your demolition permit timeline is tight, budget for it.
- Region: Labor rates and lab pricing vary by metro area, a dense urban market with competing inspectors prices differently than a rural area with one provider.
A Realistic Way to Budget
Rather than quote a single national number that will be wrong for most readers, ask any inspector two questions up front: what is your base visit fee, and what is your per-sample rate?
Because pricing varies by project, we quote each job based on the actual scope. You can see current rates on The Mold Consultant, LLC’s pricing page.
Ask for the per-sample rate in writing before you book. A low base fee paired with a high per-sample rate can end up costing more than a higher base fee with reasonable sampling, and it makes the final invoice impossible to predict.
Asbestos Abatement Regulations and What to Do If Asbestos Is Found
Finding asbestos does not automatically mean demolition stops, it means the work changes. The biggest gap in most renovation guides is what happens after a positive test: the handoff from testing to abatement to getting back to work. Here is that workflow, step by step.
Step 1: Stop Work and Isolate
The moment a report confirms asbestos, stop disturbing the material. Do not sweep, vacuum with a shop vac, or bag debris yourself, fibers settle on surfaces and dry cleanup spreads them. Close off the area if you can and keep household traffic out until a professional assesses it.
Step 2: Decide Whether to Remove or Manage in Place
Removal is not always required. If the material is in good condition, intact, and will not be disturbed by the renovation, the safest and cheapest option is often to leave it alone and manage it in place, common with intact floor tile under a new floor or pipe insulation in a wall you are not opening.
If the material is friable, damaged, or in the path of demolition, it has to come out.
Step 3: Hire a Licensed Abatement Contractor
Abatement is a regulated trade, not a general contractor task. Under NESHAP and state and local rules, removal of regulated asbestos-containing material must follow specific work practices. A licensed abatement contractor typically:
- Builds containment around the work area with plastic sheeting and critical barriers
- Sets up negative air pressure with HEPA-filtered air movers so fibers cannot escape
- Wets the material to suppress fiber release before and during removal
- Bags or wraps the material in labeled leak-tight containers and hauls it to an approved landfill that accepts asbestos waste
- Decontaminates the work area and the workers before leaving
Ask for the contractor’s license and, where required, the notification filed with the appropriate air quality agency before work begins. NESHAP generally requires advance written notice for certain projects, and the abatement contractor usually handles that filing.
Step 4: Clearance Testing Before Re-Occupancy
This is the step homeowners most often skip, and it is the one that protects you. After abatement, an independent clearance check confirms the air and surfaces are clean before renovation resumes or anyone re-enters. It typically involves visual inspection of the containment area and air sampling analyzed by an accredited lab. Without it, you have no documentation that the area is safe, and no proof if a dispute arises later.
Step 5: Document Everything
Keep the original testing report, the abatement contractor’s paperwork, the waste disposal manifest, and the clearance results together. This packet matters for permits, resale, insurance, and any future renovation touching the same area, a future owner or contractor who opens that wall will want to know what was there and how it was handled.
The four-step rule after a positive test: stop work, decide remove-or-manage-in-place, hire a licensed abatement contractor, and get independent clearance testing before re-occupancy. Skipping the clearance step leaves you with no documentation and no certainty.
Conclusion: Protecting Your Health and Investment During Renovation
A renovation that disturbs untested material can turn a remodeling budget into a health and liability problem.
That is the work we do every day at The Mold Consultant, LLC. We offer asbestos testing, mold inspection, air quality testing, and post-remediation verification, plus veteran, teacher, and first responder discounts.
Get started with The Mold Consultant, LLC and renovate with a clear answer instead of a guess.
Frequently Asked Questions
What is the 3-5-7 rule for asbestos testing?
The 3-5-7 rule is a common guideline in the asbestos industry: if a building was constructed before the 1980s, if there are three or more suspect materials, or if the renovation will disturb more than seven square feet of material, testing is strongly recommended. While not a legal standard, it helps homeowners decide when to call a certified inspector. For any renovation project in an older home, professional asbestos testing is the safest approach.
How much does asbestos testing cost?
Asbestos testing cost varies based on the number of samples, the type of materials, and the laboratory used. Most homeowners pay per sample, with additional fees for rush processing or extensive inspections. Because pricing depends on your specific project, request a quote from a certified inspector. The Mold Consultant, LLC provides transparent pricing on its website.
Can I test for asbestos in my home myself?
DIY asbestos testing kits are available, but they carry significant risks. Collecting samples yourself can release airborne fibers if you disturb friable materials, and improper collection may lead to inaccurate lab results. A certified asbestos inspector uses proper respiratory protection and safety protocols to collect bulk samples without contaminating your home. For any renovation project, professional testing is the safer and more reliable choice.
What are the legal requirements for asbestos abatement during home renovations?
Under NESHAP regulations, homeowners and contractors must follow specific procedures when renovating buildings that contain asbestos. This includes notifying the environmental health agency before demolition or renovation, using licensed abatement contractors for friable materials, and disposing of asbestos waste at approved facilities. Local regulations may add requirements. A certified inspector can clarify which rules apply to your project and help you stay compliant.