
Table of Contents
- How Fast Does Mold Grow After Water Damage?
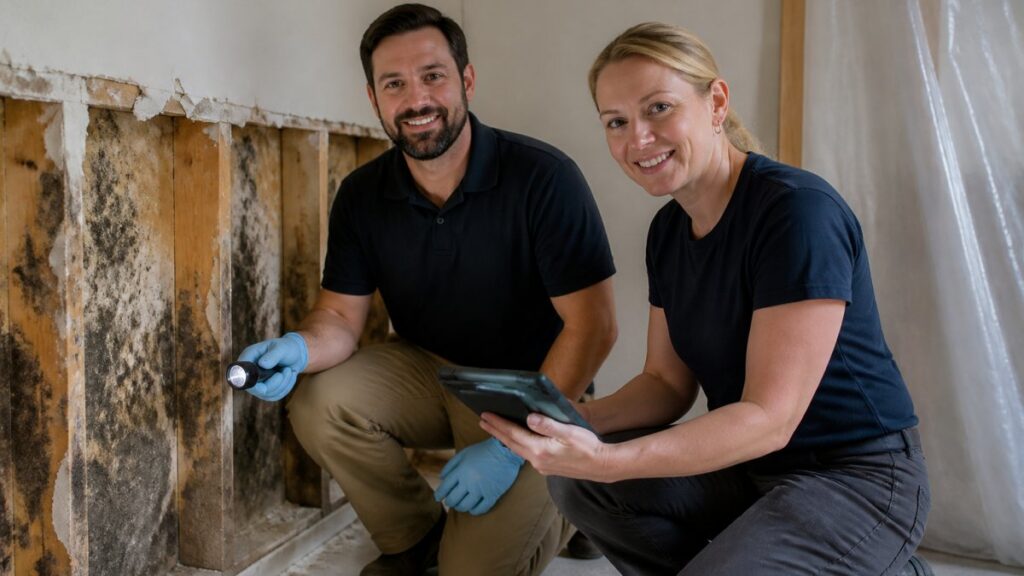
- Visual Signs of Mold Behind Drywall After a Leak
- How to Identify Hidden Moisture in Walls
- Non-Destructive Mold Testing Methods
- DIY vs. Professional Remediation Thresholds
- Post-Leak Drying Protocols and Insurance Documentation
- When to Call a Professional for Mold Behind Drywall
- Frequently Asked Questions
Last Updated: September 29, 2026
How Fast Does Mold Grow After Water Damage?
Mold can start growing on wet drywall in as little as 24 to 48 hours, and visible signs of mold behind drywall after a leak often appear within a week. This guide from The Mold Consultant, LLC explains how to spot the problem early, test for it without tearing your walls apart, and know when to bring in a pro.
Drywall is basically a sponge. It soaks up water from a leak, a burst pipe, or a slow drip inside the wall. Once the paper facing stays damp, mold spores that are already in your home’s air settle in and start to grow.
The clock starts fast. According to the EPA’s mold guidance, mold needs only moisture and a food source, and drywall provides both. Most spores germinate within a day or two of contact with wet material.
Here’s what most homeowners miss: the leak can stop and the wall can look dry on the surface while the inside stays wet for weeks. That hidden moisture is where mold behind drywall takes hold.
| Time Since Leak | What’s Happening Inside the Wall |
|---|---|
| 0-24 hours | Drywall absorbs water; surface may look normal |
| 24-48 hours | Spores germinate; no visible signs yet |
| 3-7 days | Fungal growth spreads; musty odor may start |
| 1-2 weeks | Discoloration and texture changes appear |
| 2+ weeks | Growth spreads to framing and insulation |
Visual Signs of Mold Behind Drywall After a Leak
The clearest signs of mold behind drywall after a leak show up on the surface before you ever open the wall. Discoloration, blistering, and a musty smell are the first clues.
Discoloration, Blistering, and Baseboard Clues
Look for staining that ranges from light brown to dark gray or greenish-black. Water carries minerals and dirt into the drywall, so even a faint ring is worth checking.
Check these spots first:
- Ceiling and wall stains near the leak source
- Bubbling or blistering paint
- Soft or crumbling baseboards
- Peeling tape at drywall seams
- Efflorescence, a white chalky powder left by evaporating water
Baseboard inspection matters because water pools at the bottom of a wall. If the baseboard feels soft or pulls away easily, moisture is likely trapped behind it.
Musty Odors and Spongy Texture
A musty odor is one of the most reliable signs, even when you can’t see anything. The smell comes from microbial growth feeding on wet paper and wood.
Press gently on the wall. A spongy texture means the drywall has lost its structural integrity.
Never ignore a musty odor just because the wall looks dry. In practice, smell often shows up before visible staining, and by then growth has usually been active for several days.
How to Identify Hidden Moisture in Walls
Hidden moisture is water trapped inside a wall cavity that you can’t see or feel from the surface. Finding it early is the difference between a quick fix and a full remediation.
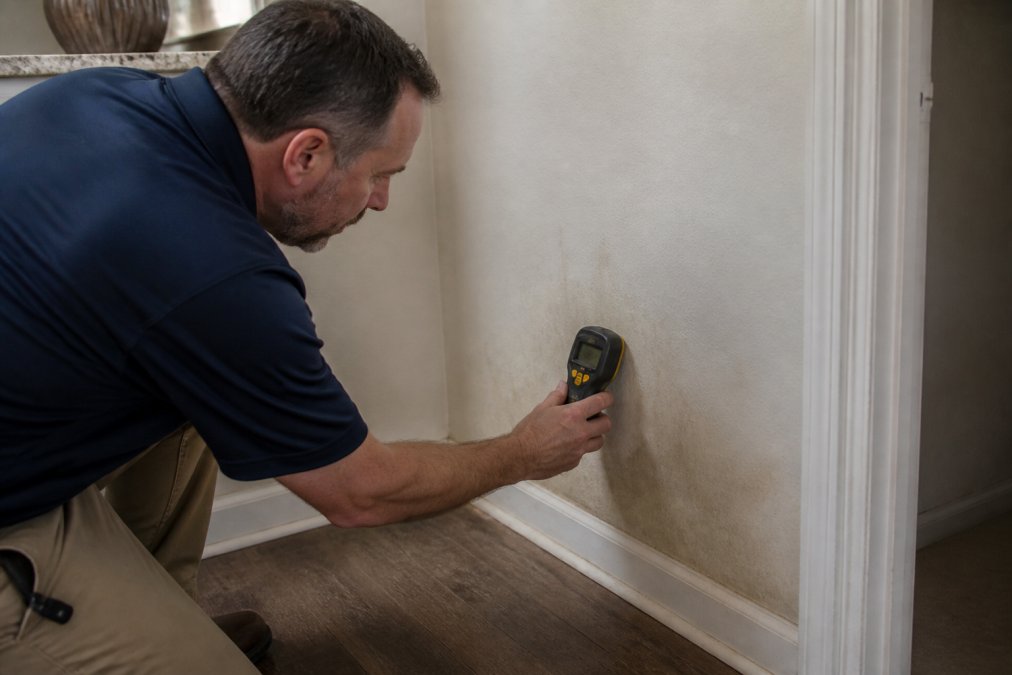
Here’s how to check a wall yourself:
- Run a moisture meter along the baseboard and around the leak area.
- Compare readings to a dry section of wall. A clear difference means trouble.
- Check relative humidity with a hygrometer. High readings point to hidden moisture.
- Use thermal imaging to map the wet zone.
- Mark the area and recheck in 24 hours.
Non-Destructive Mold Testing Methods
Here is how the common tools compare:
| Method | What It Detects | What It Cannot Prove | Best Use |
|---|---|---|---|
| Air sampling (pump + cassette) | Airborne spore count and types | Whether growth is inside a specific wall cavity | Baseline vs. post-remediation comparison |
| Surface sampling (swab or tape lift) | Microbial growth on a visible surface | Hidden growth behind intact drywall | Confirming a stain is biological, not mineral |
| Borehole + borescope | Direct visual of cavity, framing, insulation | Spore type without a separate sample | Locating the wet zone before cutting |
| Moisture meter | Water content in drywall and framing | Whether mold is present | Mapping the extent of saturation |
| Thermal imaging | Temperature differences from evaporative cooling | Moisture content by percentage | Finding the wet footprint fast |
Take photos of every reading, sample, and date. A written record with moisture content numbers and lab results carries far more weight with an adjuster than a verbal description of a smell.
Do not drill a borehole into a wall you suspect is contaminated without sealing the work area first. Disturbing moldy drywall can release spores into the room. Tape plastic sheeting over doorways and wear an N95 respirator.
A practical sequence most inspectors follow: thermal imaging first to find the wet footprint, moisture meter to confirm and quantify, borescope to see inside the cavity, then air or surface sampling only if documentation is needed. That order avoids unnecessary holes and unnecessary lab fees.
DIY vs. Professional Remediation Thresholds
You can handle a small, contained mold problem yourself. Call a professional when the growth is large, hidden, or tied to a health concern.
| Situation | DIY or Professional |
|---|---|
| Small patch under 10 sq ft, visible | DIY possible |
| Growth inside the wall cavity | Professional |
| Musty odor with no visible mold | Professional testing |
| Anyone with respiratory symptoms | Professional |
| Mold returns after cleaning | Professional |
| Insurance claim involved | Professional documentation |
Post-Leak Drying Protocols and Insurance Documentation
Proper drying within the first 48 hours is the single best way to prevent mold behind drywall. If you catch the leak early, you may avoid growth entirely. The steps below cover both the drying itself and the documentation that determines whether an insurer pays for remediation.
The first 48 hours
- Stop the water source and remove standing water with a wet/dry vacuum or towels.
- Pull back carpet, pad, and move furniture at least 12 inches from the wall.
- Run dehumidifiers and fans to lower relative humidity. Aim to bring indoor RH below 50 percent.
- Keep air moving for at least 3 to 5 days, longer if moisture readings stay elevated.
- Check moisture content daily at the same marked points until readings return to the drywall baseline.
- Document everything with photos and dates.
Structural drying aims to return water-damaged materials to their normal moisture content. A vapor barrier inside the wall can slow drying, so airflow into the cavity matters. In many cases a small fan directed at a baseboard gap or a borehole moves more air than a room fan alone.
Documentation that survives an adjuster’s review
Most policies treat a sudden, accidental leak differently from long-term neglect. The difference usually comes down to what you can prove. Build the file as if you will have to defend it months later.
- Photos with timestamps. Shoot wide shots showing the room, then close-ups of the stain, the leak source, and the moisture meter display. Include a coin or ruler for scale.
- Moisture readings with dates and locations. Note the meter model, the reading, and where on the wall you took it. A log showing readings falling over time proves you dried actively.
- Receipts. Keep receipts for fans, dehumidifiers, desiccant, plastic sheeting, and any equipment rentals.
- A written report if a pro inspects the wall. A third-party moisture or mold assessment carries more weight than a homeowner’s description.
- The plumber’s or contractor’s invoice that identifies the leak source and the repair date.
How claims are typically handled
Documentation is not paperwork for its own sake. In a disputed claim, the homeowner with dated photos, moisture logs, and receipts is far more likely to get the mold portion covered than one who only has a verbal account.
If you are unsure whether the wall has dried completely, a moisture assessment before you close up or repaint will tell you whether the cavity is ready, or whether you are about to seal in a problem.
When to Call a Professional for Mold Behind Drywall
Call a professional when you smell mold but can’t see it, when the growth is inside a wall cavity, or when anyone in the home has respiratory symptoms.
Some warning signs need expert eyes:
- A musty odor that won’t go away
- Moisture readings that stay high after drying
- Mold that returns after you clean it
- HVAC system contamination spreading spores
- A pending real estate transaction or insurance dispute
Frequently Asked Questions
Can you tell if mold is behind drywall without removing it?
Yes, you can often detect mold behind drywall without demolition. Signs include musty odors, discoloration, and soft spots. Non-destructive methods like moisture meters, thermal imaging, and borescope inspections can confirm hidden moisture and mold growth. These tools let you assess the situation without cutting into walls, saving time and money.
How long does it take for mold to grow behind drywall after a leak?
Mold can start growing within 24 to 48 hours after water damage. Drywall is porous, so it absorbs moisture quickly. If the leak isn’t dried within 48 hours, mold spores can germinate. Visible signs may appear in 1-2 weeks. Prompt drying is critical to prevent mold behind drywall.
What are the health risks of mold growing behind drywall?
Mold exposure can cause respiratory symptoms like coughing, sneezing, and wheezing. It may also trigger allergic reactions and asthma attacks. Some molds produce mycotoxins, which can lead to more severe health issues. If you suspect mold behind drywall, addressing it quickly protects your indoor air quality and health.
Should I hire a professional for mold inspection after a leak?
If you suspect hidden moisture or mold behind drywall, a professional inspection is wise. Certified inspectors use non-destructive tools like thermal imaging and moisture meters to detect problems without damage. They can also provide documentation for insurance claims and remediation plans. For small, visible mold, DIY may suffice, but hidden mold often requires expert eyes.
A leak you can’t see can still leave mold behind your walls. The sooner you test for hidden moisture, the more you protect your health, your home, and your wallet. The Mold Consultant, LLC offers expert mold inspection, non-destructive moisture detection, and indoor air quality analysis to find the root cause, not just the symptom. Get started with The Mold Consultant, LLC and get clear, documented answers about what’s really behind your walls.