
Table of Contents
- Start Your Mold Insurance Claim Checklist Before You Touch Anything
- How to Document Mold: Photos and Videos for a Mold Insurance Claim
- Water Damage Documentation for Insurance Claim: Tracking the Source and Timeline
- Professional Inspections, Moisture Readings, and Remediation Estimates
- Organizing Receipts, Reports, and Insurance Communication
- Mold Claim Denial Appeal: How to Respond to a Denied or Disputed Claim
- Frequently Asked Questions
Last Updated: October 9, 2026
Start Your Mold Insurance Claim Checklist Before You Touch Anything
The first rule of how to document mold for insurance claims is simple: stop and record before you clean. We’ve watched homeowners scrub away the very evidence that would have paid their claim.
That’s why documentation comes first. Not cleanup. Not a phone call. Documentation.
Here’s the core tension most guides skip: your insurance policy covers the water damage that let mold grow, not usually the mold itself.
Mold damage is the physical deterioration of building materials caused by fungal growth after moisture exposure. It shows up as discoloration, warping, and a musty odor.
A mold insurance claim checklist keeps you organized at every stage:
- Stage 1, Discovery: photos, video, and notes before any cleanup
- Stage 2, Cause: proof of the water source and when it started
- Stage 3, Scope: professional moisture readings and a remediation estimate
- Stage 4, Filing: receipts, reports, and written communication with your insurer
What Counts as Evidence at Each Claim Stage
Each stage answers a different question your adjuster will ask. Discovery evidence proves mold exists. Cause evidence proves a covered event happened. Scope evidence proves how far the damage reaches. Filing evidence proves what you spent and what was agreed.
Miss one stage and you hand the insurer a reason to trim your payout.
How to Document Mold: Photos and Videos for a Mold Insurance Claim
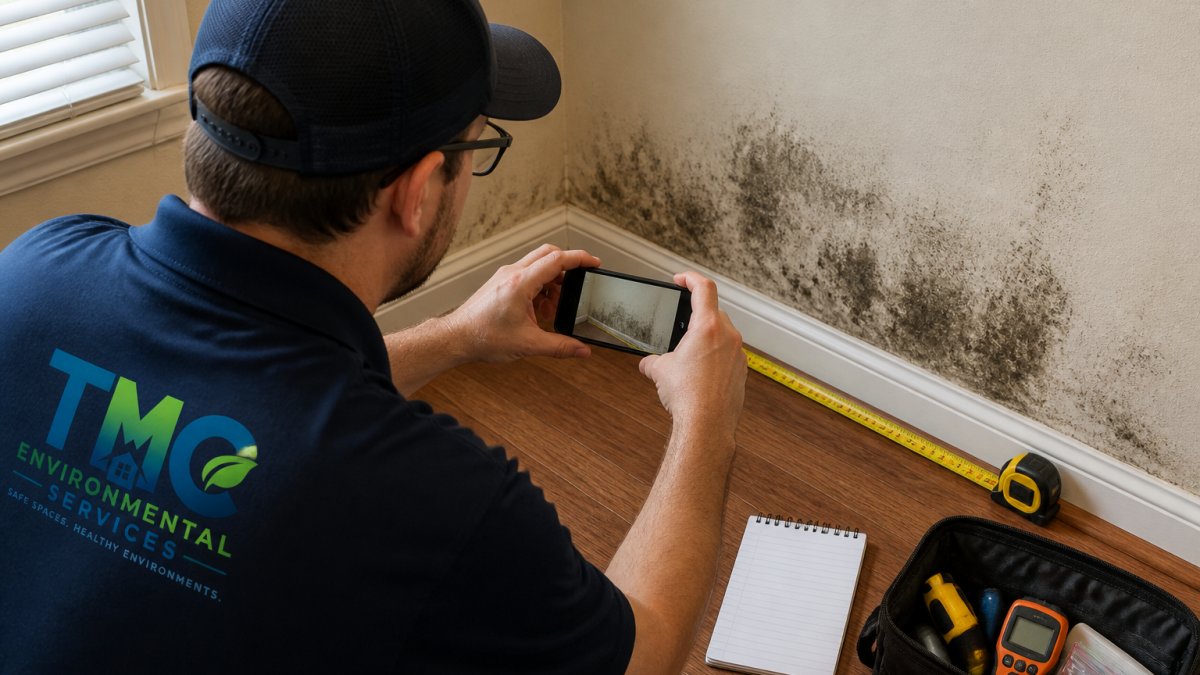
Photograph everything before you move a single item. Photos for a mold insurance claim carry more weight than any written description. An adjuster can’t visit the past, so your images become the record.
A Photo and Video Protocol That Survives Review
Follow this sequence for every affected area. The order matters because it moves from context to detail, the same way an adjuster reads a loss.
- Establishing wide shot of the whole room, taken from the doorway, showing furniture, layout, and the relationship between the mold and the water source.
- Mid-range shot of the wall, ceiling, or floor where mold appears, framed so the room’s corners or a doorframe are visible for orientation.
- Close-up of the mold itself, in focus, filling most of the frame.
- Scale shot with a tape measure, ruler, or a coin (a quarter is a common reference) laid beside the growth so size is unambiguous.
- Video walkthrough narrating what you see and smell, moving slowly, and stating the date, room name, and what you are looking at out loud.
- Repeat shots of the same angles at each visit, so the adjuster can see whether the affected area is growing, stable, or drying.
Labeling, Timestamps, and Repeat Intervals
A folder of 200 unlabeled photos is weaker than 20 labeled ones. Build a simple naming convention: date, room, and shot type, for example 2026-10-09_basement-north-wall_closeup.
Most practitioners find that repeat photos taken at consistent intervals, such as daily during active mitigation and weekly afterward, do more to establish the timeline than a single exhaustive session. Consistency signals that the condition was monitored, not staged.
Don’t wipe, spray, or paint over visible mold before photographing it. Even a quick bleach spray destroys the pattern and spread that proves your claim. Document first, clean later.
Documenting Without Making the Damage Worse
This is the tension most guides skip: you are told to preserve evidence, but you are also obligated under most policies to take reasonable steps to prevent further damage. You can do both. Photograph and video the affected area first, then begin mitigation, and photograph again after mitigation so the record shows what you did and why.
Reasonable mitigation typically includes stopping the water source, extracting standing water, running dehumidifiers and fans, and removing only the materials that cannot be saved. Keep the removed material if it is practical, or photograph it before disposal with the same wide, mid, and close-up sequence.
If you must remove moldy material to stop the spread, lay it on a clean surface and photograph it next to a tape measure before you throw it away. That single image often replaces an argument about how far the damage extended.
What Photos Cannot Prove
Visible mold in a photo proves mold existed on the day you took the picture. It does not prove when the moisture started, how it started, or whether the cause is a covered event. That is why the photo record has to be paired with source documentation and professional moisture evidence. Treat photos as the map, not the argument. Establishing a clear chain of custody for these materials transforms raw documentation into admissible evidence that can withstand the scrutiny of a formal legal challenge.
Water Damage Documentation for Insurance Claim: Tracking the Source and Timeline
Water damage documentation for an insurance claim starts with the source. Insurers pay for sudden and accidental water damage, like a failed supply line. They often exclude long-term leakage that built up slowly. Your evidence has to show which one happened.
Build a written timeline:
- When you first noticed the moisture or smell
- When you found the source, and what it was
- What you did to stop the water
- Who you called, and when
Keep every text, email, and receipt tied to those dates. If a plumber repaired a pipe, that invoice is evidence of the cause of loss. A common mistake is tossing these records after the repair. Keep them.
Take one photo of the water source itself, even after repair. A shut-off valve, a cracked fitting, or a stained pipe joint tells the adjuster exactly what failed.
Professional Inspections, Moisture Readings, and Remediation Estimates
Hidden moisture is where claims get disputed. You can see surface mold, but you can’t see what’s inside the drywall. That’s the gap a professional inspection fills.
A qualified inspector uses moisture readings and moisture mapping to trace water through building materials. This shows the extent of damage far beyond what’s visible.
At The Mold Consultant, LLC, our mold inspection uses non-destructive tools to find hidden moisture intrusion points without tearing your home apart.
Pair the inspection with a remediation estimate from a qualified contractor. That estimate anchors your repair costs to a real number.
Organizing Receipts, Reports, and Insurance Communication
A tidy evidence file beats a shoebox of papers every time. But the file only helps if it is organized the way a claim is actually evaluated: by stage, not by document type. This is the piece most guides leave out. An adjuster reviewing your claim is answering four questions in order, and your folder structure should mirror them.
A Claim Folder Structure Built Around the Four Stages
Create one master folder, digital or physical, with four subfolders that match the stages in your checklist:
- 01_Discovery: dated photos, video, and your initial written notes describing what you saw and smelled.
- 02_Cause: the plumber’s invoice, the appliance repair receipt, the storm date, the HOA or neighbor report, and any photo of the failed fitting or valve.
- 03_Scope: the inspection report, moisture maps, lab results, and remediation and repair estimates.
- 04_Filing: your proof of loss, every email and letter exchanged with the insurer, call logs, and payment records.
Numbering the folders keeps them in claim order and makes it obvious when a stage is thin. If 02_Cause is nearly empty, that is the gap the insurer will attack.
The Evidence Log
Alongside the folders, keep a single running log, a spreadsheet or a lined notebook, with one row per item. Columns that work well:
| Date | Item | Stage | Source | Amount | Notes |
|---|---|---|---|---|---|
| 2026-10-09 | Basement close-up photos | Discovery | Homeowner | , | 14 images, north wall |
| 2026-10-10 | Plumber invoice, supply line | Cause | ABC Plumbing | $, | Replaced fitting |
| 2026-10-12 | Moisture inspection report | Scope | Inspector | $, | 3 rooms mapped |
Leave the amount blank rather than guessing. The log’s value is traceability, not accounting. When the adjuster asks “when did you first notice this,” you can point to a row instead of reconstructing from memory.
Naming, Retention, and Backups
Use the same naming convention across folders: date, stage, and short description, for example 2026-10-10_cause_plumber-invoice.pdf. Back the whole folder up to cloud storage and keep one physical copy of the most important documents, since adjusters sometimes ask for originals.
Retention matters more than most people expect. Do not discard receipts, invoices, or reports after a repair is complete. A claim can be reopened, disputed, or audited months later, and the cause-of-loss record is the first thing requested.
Written Communication Discipline
Send important updates in writing, not just by phone. A written notice creates a record. If you call, follow up with an email summarizing what was said, who you spoke with, and any deadline mentioned. Save the sent copy, not just the reply. If the insurer sends a scope-of-loss or estimate document, file it in 04_Filing and note the date received, because response deadlines often run from that date.
The strongest claims are the ones an adjuster can verify without calling you. A stage-based folder and a running evidence log do that work for you.
Mold Claim Denial Appeal: How to Respond to a Denied or Disputed Claim
A denial isn’t the end. Most denials point to a specific reason, like a claimed exclusion or a missing proof of cause.
For a mold claim denial appeal, you’ll typically:
- Request the denial reason in writing
- Gather evidence that answers that exact reason
- Submit a written appeal before the deadline in your policy
- Include professional documentation that supports your cause of loss
If the dispute is about scope, a neutral inspection report can settle it. Our team provides neutral mediation for mold-related property disputes.
For the rules that govern insurance practices, the National Association of Insurance Commissioners publishes consumer guidance, and your state’s department of insurance handles complaints.
Mold claims reward the prepared and punish the hasty. Our mold inspection, air quality testing, and neutral reporting give you the professional documentation insurers take seriously.
Frequently Asked Questions
What should I document when I find mold in my home?
Record the date and time you first noticed the mold, the exact location, and how large the affected area is. Take date-stamped photos and video before cleaning anything. Note any musty odors, recent water intrusion, or plumbing leaks. Keep a written timeline of when the moisture problem started and every repair or inspection since. If you hire a professional, save the moisture readings and inspection report. This record becomes the backbone of your insurance claim and helps prove the cause of loss.
What photos should I take for a mold insurance claim?
Photograph the visible mold from multiple angles, then zoom out to show the room and the source of moisture, such as a leaking pipe or window. Include a tape measure or coin for scale. Capture date-stamped wide shots and close-ups of affected building materials like drywall, insulation, and flooring. Document any water staining, bubbling paint, or warped wood. Take short videos walking through the space to show the full extent of damage. Save the original files with timestamps; do not edit or delete them.
Does homeowners insurance cover mold caused by water damage?
Coverage depends on the cause. Most homeowners insurance policies cover mold that results from a sudden and accidental water damage event, such as a burst pipe. Mold from long-term leakage, poor maintenance, or flooding is typically excluded. Many policies also cap mold remediation with a mold sublimit, often separate from your general dwelling coverage. Review your policy’s exclusions and sublimit before filing. A professional mold inspection can help document the cause of loss and support your claim.
What should I do if my insurance company denies a mold claim?
Request the denial in writing and read the specific reason cited, whether it’s a policy exclusion, a mold sublimit, or a dispute over the cause of loss. Gather your documentation: date-stamped photos, moisture readings, inspection reports, and remediation estimates. If the denial is based on cause, a professional inspection report distinguishing sudden water damage from long-term leakage can strengthen your mold claim denial appeal. You can also request a re-inspection, file a complaint with your state insurance department, or consult a public adjuster.