
Table of Contents
- Why Mold Keeps Coming Back: Symptom vs. Root Cause
- Step 1: Map the Mold and Document What You See
- Step 2: How to Identify Hidden Moisture in Walls
- Step 3: Using a Moisture Meter for Mold Inspection
- Step 4: Rule Out Condensation, Ventilation, and HVAC Causes
- Step 5: Build a Root-Cause Decision Tree for Recurring Mold
- Step 6: Verify the Fix and Confirm the Mold Root Cause Is Gone
- When to Call a Professional Mold Inspector
- Frequently Asked Questions
Last Updated: October 18, 2026
Why Mold Keeps Coming Back: Symptom vs. Root Cause
Mold is a symptom. Learning how to find mold root cause means tracing the symptom back to its water source before you spend money on cleanup.
Here’s what most guides get wrong: they treat mold as a cleaning problem. It isn’t. The EPA’s mold guidance makes this plain: no moisture, no mold.
At The Mold Consultant, LLC, we’ve inspected homes for over a decade, and the pattern rarely changes. The mold spot on the ceiling is a messenger.
Never start with bleach. Start with a moisture source. Cleaning mold without fixing the water guarantees a repeat visit.
Step 1: Map the Mold and Document What You See
Start by drawing a simple floor plan of your home and marking every spot where you see or smell mold. This map becomes your evidence trail.
Record four things for each spot:
- Location and size (a coin, a dinner plate, a whole wall)
- Color and texture
- Whether it’s dry or damp to the touch
Photograph everything with a phone and add the date. If you’re a landlord, this documentation matters later for tenant disputes and insurance claims.
Signs of Hidden Mold in a House
The signs of hidden mold in a house often show up before you ever see growth:
- A musty odor that won’t leave a room
- Peeling paint or bubbling drywall
- Warped baseboards or soft spots in floors
Any one of these is reason enough to keep investigating. Two or more together usually means active moisture behind a surface.
Step 2: How to Identify Hidden Moisture in Walls
To identify hidden moisture in walls, follow the water. Water travels along studs, pipes, and gravity, so the wet spot you find is rarely where the leak starts. The goal of this step is to trace the moisture pathway from the visible symptom back to the entry point, not to open walls and hope.
How water actually moves through a house
Water takes four common pathways, and each produces a different pattern of staining and dampness:
- Gravity and framing: Water entering at a roof or window runs down studs and plates, then pools at the lowest point, often a baseboard, floor joist, or ceiling below a bathroom. A stain low on a wall frequently means the entry is one floor up.
- Capillary action: Water wicks sideways through porous materials like drywall paper, plaster, brick, and concrete. This is why a foundation leak can show up as damp drywall two feet above the floor line.
- Air movement: Humid air escapes into wall cavities through gaps around outlets, penetrations, and top plates, then condenses on cooler surfaces inside the cavity. This pattern produces mold with no visible water stain at all.
Understanding which pathway fits the pattern narrows the source before you take a single reading.
Check these areas in order
Work from the most common and easiest-to-confirm sources outward:
- Below every window and exterior door, sill pans, flashing, and caulk joints fail first.
- Around bathroom and kitchen plumbing, supply lines, traps, and valve packing.
- Under sinks and behind toilets, look for staining on the cabinet floor and swelling at the toe kick.
- Along the ceiling line beneath bathrooms, a slow drain leak shows as a ring that grows after showers.
- Where the roof meets exterior walls, step flashing and kick-out flashing are frequent failure points.
- At the foundation line and rim joist, grading, gutters, and downspouts that discharge too close to the house.
- Around HVAC air handlers, condensate pans, and duct boots, a clogged condensate drain overflows into the ceiling or closet.
Run your hand along surfaces and look for cool patches. A drywall corner that feels colder than the wall next to it is holding water.
How to find a water leak behind a wall
To find a water leak behind a wall, watch for clues that point to the source rather than the damage:
- A water stain that grows after rain points to a roof, flashing, or exterior wall leak.
- Staining that grows after showers points to plumbing, grout failure, or a failed shower pan.
- A bulge low on a wall suggests a slow supply-line drip above it.
Shut off the water supply and watch the meter. If it still moves, you have a supply leak. If it stops, the source is drainage or rain. For a slower confirmation, place a dry paper towel under suspect plumbing and check it after a day of normal use.
When non-invasive checks are not enough
Consumer tools have limits. Escalate to a qualified building professional when any of these are true:
- A moisture meter shows elevated readings across a large area but no visible source.
- Staining returns after a repair you believed was complete.
- The affected area is larger than a few square feet, or mold is visible inside a wall cavity.
At that point, professionals use thermal imaging, pin and pinless meters, and controlled openings to map the pathway without spreading spores into clean rooms.
Don’t cut into drywall to “look around.” You can spread spores into clean rooms and create a bigger repair. Measure and map first, then open only the confirmed wet zone.
Step 3: Using a Moisture Meter for Mold Inspection
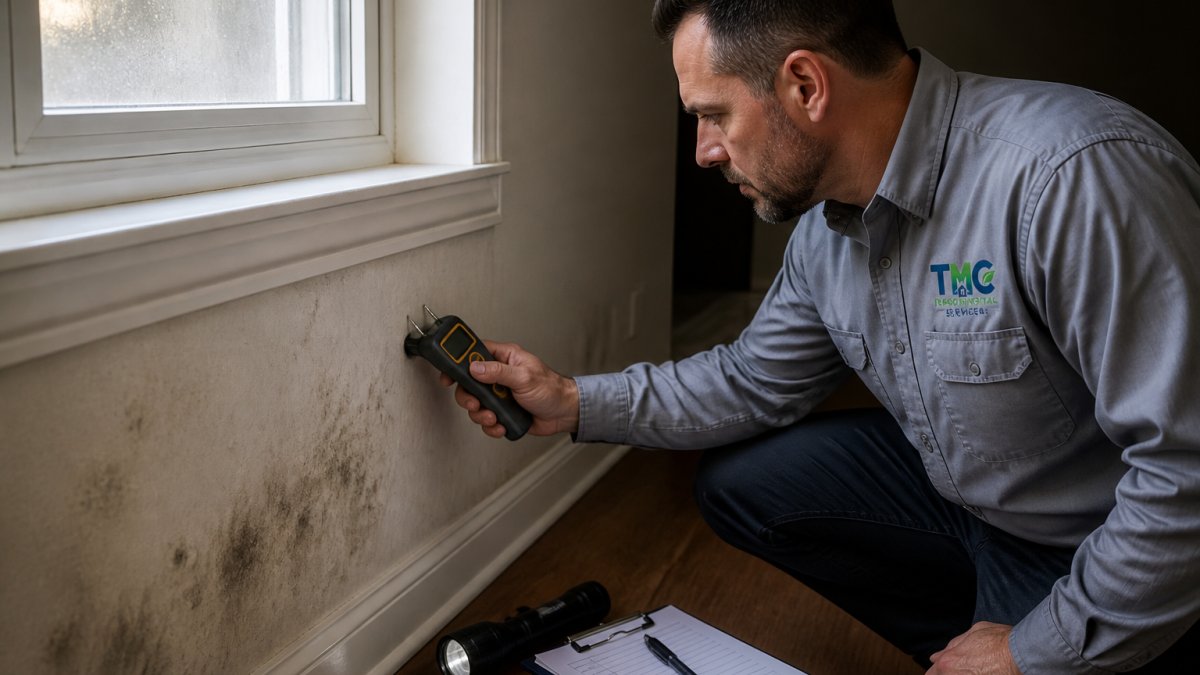
A moisture meter for mold inspection gives you numbers instead of guesses. A pin-type meter reads moisture at the surface; a pinless meter scans through drywall, tile, and wood without damage. Used well, a meter tells you where to look next. Used poorly, it produces false confidence.
Where to measure
Scan the whole room, not just the visible spot. Mark readings on your floor plan. Compare suspect areas to known-dry reference points in the same room, a meter reading means little without a baseline.
Measure in these locations:
- Directly on and around every visible stain or growth.
- Six to twelve inches beyond the visible edge, to find how far moisture has spread.
- The same spot on the opposite side of the wall, if accessible.
How to compare readings
Take readings in the same spot at the same time of day, twice, 48 hours apart. One high reading can be a fluke, a cold pipe, a metal stud, or a recent shower can skew a pinless meter. A rising trend is a real moisture source.
Compare three things:
- Suspect vs. reference: A suspect area reading higher than a known-dry wall in the same room is meaningful. A suspect area reading the same as the reference is probably not the source.
- Edge vs. center: Moisture that is higher at the edge of a stain than at its center often means the source is nearby and spreading outward.
- Time vs. time: A reading that climbs after rain, showers, or laundry use points to a specific pathway. A reading that stays flat points elsewhere.
Reading humidity and moisture numbers
Interpreting the numbers matters more than taking them. Here’s how to read what your meter and hygrometer tell you:
| Reading | What It Means | What to Do |
|---|---|---|
| Wood below 15% | Normal, dry | No action needed |
| Wood 15-20% | Elevated, watch it | Recheck in 48 hours |
| Wood above 20% | Wet enough for mold | Find and fix the source |
| Drywall above 1% (pinless) | Possible moisture | Confirm with a pin meter |
| Indoor humidity above 60% | Mold-friendly air | Ventilate or dehumidify |
| Indoor humidity 30-50% | Healthy range | Maintain it |
Mold needs roughly 48 hours of wet conditions to take hold. That window is your deadline.
What meters can and cannot prove
A meter measures moisture, not mold. It cannot tell you whether growth is active, what species it is, or whether the air is contaminated. It also cannot confirm the source, only that moisture is present.
Treat meter readings as directional evidence. Use them to decide where to look next, then confirm the source with a visual inspection, a controlled opening, or a professional assessment.
Take readings in the same spot at the same time of day, twice, 48 hours apart. One high reading can be a fluke. A rising trend is a real moisture source.
Step 4: Rule Out Condensation, Ventilation, and HVAC Causes
Not every mold problem starts with a leak. Condensation forms when warm, humid air meets a cold surface, and it’s the most common cause we find on windows, exterior walls, and ceiling corners.
Run through this checklist:
- Do bathroom fans actually exhaust outdoors, or just into the attic?
- Does the dryer vent outside the house?
- Are windows sweating on the inside?
Poor ventilation traps humidity indoors. Fixing airflow and humidity often solves recurring mold without any repair work.
Step 5: Build a Root-Cause Decision Tree for Recurring Mold
When mold keeps returning, use a decision tree to narrow the mold root cause fast. Work through these branches:
- Mold returns after rain → check roof, flashing, and exterior seals
- Mold returns after showers or laundry → check ventilation and exhaust
- Mold appears only in one room → check that room’s plumbing and windows
Each branch points to a different trade and a different fix. Guessing wastes money. Tracing saves it.
Step 6: Verify the Fix and Confirm the Mold Root Cause Is Gone
Repairs aren’t proof. Verification is. After any fix, wait for the materials to dry completely, then re-measure.
Follow this sequence:
- Re-scan the repaired area with your moisture meter
- Confirm readings match dry reference points
- Hold indoor humidity between 30% and 50%
If readings stay dry and no new growth appears, you’ve likely solved it. If growth returns, your mold root cause was misdiagnosed, and it’s time to escalate.
The CDC’s mold cleanup and prevention page recommends fixing the water problem before cleanup, and drying water-damaged materials within 24 to 48 hours.
When to Call a Professional Mold Inspector
Call a professional when mold returns after two repair attempts, when the affected area is larger than a few square feet, or when anyone in the home has respiratory symptoms.
At The Mold Consultant, LLC, our mold inspection uses non-destructive testing to pinpoint moisture intrusion before anything is opened.
Pricing depends on the property and scope. You can find current rates on our website.
Frequently Asked Questions
How can you tell if mold is coming from a leak or condensation?
Look at where the growth sits and how it spreads. Leak-driven mold usually clusters in one area near a plumbing line, roof penetration, or window frame, and the material stays wet long after rain or water use stops. Condensation mold tends to appear on cold surfaces like exterior walls, window glass, and ceiling corners, and it returns whenever indoor relative humidity climbs. A moisture meter reading taken after drying the surface helps confirm which pattern you have.
What tools can help locate moisture that is causing mold?
A pin-type or pinless moisture meter is the starting tool for checking drywall, trim, and subfloor. A hygrometer measures relative humidity in the room, and an infrared camera can show temperature differences that hint at trapped water behind a wall. Flashlights, a screwdriver for gently probing soft spots, and a notebook for logging readings by location round out a basic kit. Any reading above the dry standard for the material warrants further investigation.
Does a mold test identify the source of the problem?
No. Air and surface sampling tells you what spores are present and at what concentration, not where the water is entering. Finding the mold root cause requires a physical moisture investigation: tracing plumbing, checking roof and window penetrations, measuring humidity, and verifying that materials dry to normal levels. Testing is most useful after the source is located, to document conditions or confirm cleanup, not as a substitute for the moisture hunt.
How do you find the cause of mold that keeps coming back?
Recurring mold almost always means an unresolved moisture source. Recheck the original area with a moisture meter after repairs, inspect for slow plumbing drips and roof flashing gaps, and log indoor relative humidity over several days. If readings stay elevated in one zone, the water pathway was never fully closed. A post-remediation verification inspection confirms whether materials dried to normal and whether the mold root cause was actually addressed.
Mold that keeps returning is a moisture problem you haven’t found yet. If you’ve cleaned, painted, and still see growth, the source is still active. The Mold Consultant, LLC brings over a decade of inspection experience, non-destructive testing, and written findings you can act on or hand to your insurer. Get started with The Mold Consultant, LLC and confirm your mold root cause is gone for good.