
Quick Summary
To remove toxic mold safely, first measure the affected area and find the moisture source, then wear protective gear, contain the work area, and clean or remove the growth. Call a professional for large, hidden, or contaminated mold.
- DIY cleanup is reasonable only when the visible growth covers less than roughly 10 square feet.
- Hire a professional if mold is inside the HVAC system, wall cavities, or insulation.
- Wear an N95 respirator, sealed goggles, and nitrile gloves before disturbing any growth.
- Turn off the HVAC system and seal the work area so spores do not spread through the house.
- Fix leaks within 24 to 48 hours and keep indoor humidity below about 60 percent.
Table of Contents
- Assess the Size and Location of the Mold Before You Start
- Decide Whether to Clean It Yourself or Hire a Professional
- Gather the Right Protective Equipment for Mold Cleanup
- Contain the Work Area, Ventilate, and Shut Off the HVAC System
- Step-by-Step: Cleaning Hard Surfaces and Removing Affected Materials
- Safe Disposal of Contaminated Materials and Cleaning Products
- Fix the Moisture Source and Prevent Mold From Returning
- Booking Your Mold Inspection and Post-Cleanup Verification
- Frequently Asked Questions
Before cleaning up, it helps to know where the mold is and how big the problem is. Mold can hide behind drywall, under flooring and inside HVAC ducts, and the visible patch is often only part of it. The same questions come up again and again when homeowners sort out these problems.
Mold is a fungus that grows where moisture sits too long (the EPA).
Last Updated: October 29, 2026
Assess the Size and Location of the Mold Before You Start
Start by measuring the affected area. Small, surface-level growth can often be handled by a careful homeowner. Growth covering a large area, or growth inside walls and ceilings, calls for a different approach.
Check these spots first:
- Bathroom ceilings and shower walls
- Under sinks and around water heaters
- Behind furniture pushed against exterior walls
Note any musty smell, even when you see nothing. A strong odor often points to growth you cannot see. Take photos and write down the dimensions before you touch anything.
Decide Whether to Clean It Yourself or Hire a Professional
Most cleanup guidance stops at a single number: if the patch is smaller than about 10 square feet, do it yourself. A threshold of about 10 square feet is often cited as a starting point, but it is not a complete decision rule. A small patch behind a toilet is a different job from a small patch inside an HVAC duct or a wall cavity. Use the criteria below to sort your situation before you buy supplies or call anyone.
DIY is reasonable when all of these are true
- The visible growth covers less than roughly 10 square feet in total, measured across all affected spots, not just the largest patch.
- The mold is on a hard, nonporous surface such as tile, glass, metal, sealed concrete, or painted trim that can be scrubbed and dried.
- The moisture source is obvious and fixable, a loose supply line, a failed caulk bead, a clogged condensate drain, and you can correct it the same day.
Hire a professional when any of these are true
- The affected area is larger than about 10 square feet, or the true extent is unknown because the growth disappears behind drywall or under flooring.
- Mold is inside the HVAC system, ducts, wall cavities, ceiling assemblies, or insulation. Surface cleaning cannot reach these spaces, and running the system can spread spores through the house.
- The water damage came from sewage, a flooded basement, or long-standing leakage. Contaminated water introduces bacteria and other hazards beyond mold.
A practical way to sort the call
Measure the total affected area, note the material, and check whether the HVAC system serves the room. If the growth is small, on a hard surface, and tied to a leak you can fix, DIY is reasonable. If any of those conditions fails, treat it as a professional job. When you are unsure, the safer default is to have the area assessed before you disturb it, disturbing mold without containment can spread spores and make a small problem larger.
Do not use the 10-square-foot guideline as a reason to ignore a small patch in a sensitive location. A patch the size of a dinner plate inside an HVAC return or behind baseboard in a child’s bedroom warrants professional assessment even though it falls under the size threshold.
Pricing depends on the size of the job, the materials involved, and whether reconstruction is needed, so request a written scope and quote before work begins. Review what a professional mold inspection typically costs to compare quotes.
Gather the Right Protective Equipment for Mold Cleanup
Protect yourself before you disturb any growth, because when you remove toxic mold, disturbed spores can enter the air and cause coughing, eye irritation and allergic reactions.
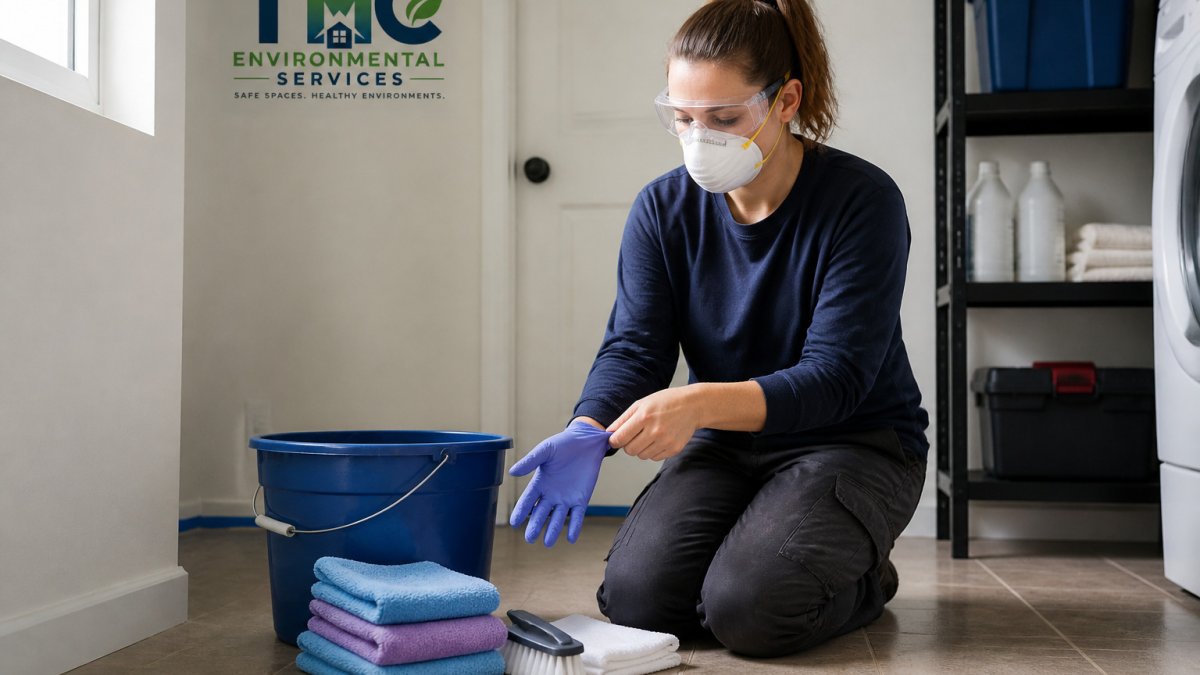
Use this basic kit:
- Nitrile gloves that cover the wrist
- Sealed goggles, not open-front safety glasses
- An N95 respirator, fitted snugly to your face
- Disposable coveralls or old clothes you will wash right away
!A homeowner in a bright utility room pulling on nitrile gloves, safety goggles and an N95 respirator before starting cleanup, with a bucket and microfiber cloths on the floor nearby
Watch out: Never use a standard dust mask in place of an N95. A dust mask does not filter fine mold spores, and it gives a false sense of safety.
Contain the Work Area, Ventilate, and Shut Off the HVAC System
Containment keeps spores from spreading to the rest of the house. Close doors to the affected room and seal the vents with plastic sheeting and tape.
Then take these steps:
- Turn off the heating and air-conditioning system before you start
- Open windows to the outside for ventilation
- Use a box fan pointed out a window, not into the house
- Keep children and pets out of the work area
Running the HVAC system during cleanup pulls spores through the ducts and into every room. Keep it off until the cleanup is finished and the area is dry.
Step-by-Step: Cleaning Hard Surfaces and Removing Affected Materials
Work through the cleanup in a clear order:
- Spray the moldy surface lightly with water so spores stay put.
- Scrub hard, nonporous surfaces such as tile, glass and metal with a detergent and water solution.
- Rinse with clean water and wipe dry with a clean cloth.
- Remove porous materials that cannot be fully cleaned, including drywall, carpet pads and ceiling tiles.
- Bag removed materials in heavy plastic while still damp, then seal the bags.
For drywall, cut out the moldy section about 2 feet beyond the visible growth and check the framing behind it. Mold on drywall usually means the material has soaked up moisture, so replacing it is often the only reliable fix.
Avoid mixing cleaning products. Bleach mixed with ammonia or vinegar releases toxic gases. Use one product at a time and rinse between uses.
The cleanup order below is the sequence the article recommends for working through the job.
| Step | What to do | Time or frequency |
|---|---|---|
| 1 | Spray moldy surface lightly with water | Before scrubbing |
| 2 | Scrub hard, nonporous surfaces with detergent solution | Not specified |
| 3 | Rinse with clean water and wipe dry | Not specified |
| 4 | Remove porous materials that cannot be fully cleaned | Not specified |
| 5 | Bag removed materials in heavy plastic while damp | Seal bags immediately |
| 6 | Cut drywall about 2 feet beyond visible growth | About 2 feet beyond growth |
Safe Disposal of Contaminated Materials and Cleaning Products
Disposal is where many DIY cleanups undo their own work. Moldy drywall, carpet pad, and ceiling tiles release spores every time they are moved, and a bag that tears in a hallway spreads contamination into rooms you already cleaned. Treat removal and disposal as a contained sequence, not an afterthought.
Bag and remove debris in a controlled order
- Double-bag before moving anything. Place removed materials in a heavy-duty plastic bag (6 mil or thicker is a common choice), squeeze out excess air, and tie the top. Place that bag inside a second bag and tie it as well.
- Keep materials damp during removal. Lightly mist torn edges and cut lines with water before lifting them. Dry materials shed more spores.
- Carry bags out through a direct path. Do not drag bags through bedrooms, kitchens, or other clean spaces. If possible, route them out a window or door nearest the work area.
- Wipe the outside of each bag with a damp cloth before it leaves the containment zone.
- Stage bags in a garage or outdoor area away from living spaces until pickup or transport.
Check disposal rules before you haul anything
Municipal and county rules vary. Some jurisdictions accept moldy construction debris in regular household trash if it is bagged; others require it to go to a specific transfer station or construction-and-demolition facility. Check your local solid waste authority’s website or call before you load a vehicle. Do not burn moldy materials, and do not place them in recycling or yard waste bins.
Clean tools, clothing, and yourself before leaving the area
- Wipe hard tools, scrapers, pry bars, buckets, with a damp cloth and detergent, then dry them.
- Discard porous tools you cannot clean, such as sponges and disposable cloths, in the same double-bagged waste.
- Remove disposable coveralls inside the containment area, bag them, and shower before dressing in clean clothes.
- Wash work clothing separately from household laundry in hot water, and dry it completely.
Handle cleaning solutions safely
Use one cleaning product at a time and rinse surfaces between products. Never mix bleach with ammonia, vinegar, or other acids, the reaction releases toxic gases. Follow the label for dilution and disposal, and do not pour leftover solutions down storm drains or onto soil. Many household cleaners can be disposed of by diluting according to the label and pouring down a household drain with running water, but check the product label first because some require household hazardous waste collection.
Keep a dedicated set of work clothes and shoes for mold cleanup. Changing out of them at the containment boundary and bagging them immediately is one of the simplest ways to keep spores out of the rest of the house.
If the debris volume is large or the materials are heavily contaminated, a professional remediation contractor will handle bagging, transport, and disposal according to local rules, one more reason the size and location assessment earlier in this article matters.
Fix the Moisture Source and Prevent Mold From Returning
Cleaning the mold does nothing if the water keeps coming. Find the moisture source first. Common causes include:
- A slow leak under a sink or behind a toilet
- Condensation on cold walls or windows
- Poor ventilation in bathrooms and kitchens
- Roof leaks or clogged gutters
Use these habits to keep moisture under control:
- Run bathroom fans during and after showers
- Keep indoor humidity below about 60 percent (the EPA)
- Fix leaks within 24 to 48 hours
- Make sure dryers vent outdoors
Many homeowners find that mold returns because the leak was never fixed. Our team at The Mold Consultant, LLC uses non-destructive testing to help identify moisture intrusion.
Booking Your Mold Inspection and Post-Cleanup Verification
After cleanup, a follow-up inspection confirms that the mold is gone and the space is dry. If you are preparing a property sale, see what a mold inspection for real estate transactions involves.
Ask any inspector to explain their findings in writing so you have a clear record.
The Mold Consultant, LLC offers mold inspection, air quality testing and post-remediation verification for homes and businesses. The Mold Consultant, LLC is locally owned and operated.
Frequently Asked Questions
Can I safely remove mold from my home myself?
Yes, for small, visible patches on hard, nonporous surfaces, such as tile, sealed countertops or metal, many homeowners can clean the area themselves. Use protective gear, ventilate the room, and scrub with detergent and water or a household cleaning solution. Do not mix cleaning products, and stop if the growth covers more than about 10 square feet, appears in the HVAC system, or is hidden inside walls. In those cases, a professional mold remediation company is the safer choice.
Should I use bleach to remove mold?
Bleach can kill mold on hard, nonporous surfaces, but it does not reliably remove mold from porous materials like drywall or wood, where moisture reaches deep into the material. Never mix bleach with ammonia or other cleaners, because the fumes can be dangerous. Many professionals prefer detergent and water followed by thorough drying, and the EPA guidance on mold cleanup recommends against using biocides as a substitute for fixing the moisture source.
How can I prevent mold from coming back after cleanup?
Mold returns when moisture returns, so the first step is finding and fixing the source, whether that is a leak, condensation, or poor ventilation. Dry the area completely, which often takes 24 to 48 hours with fans and a dehumidifier, and keep indoor humidity below about 60 percent. Check the area monthly for the first few months and watch for musty odors or discoloration, which signal that moisture is still present.
