

Last Updated: November 4, 2026
Quick Summary
To improve indoor air quality in older homes, fix pollution at the source first, then ventilate, then filter, in that order. Seal gaps and penetrations, run kitchen and bathroom exhaust fans that vent outdoors, and open windows on opposite sides for cross-ventilation. A HEPA air cleaner is the last layer, not the first.
- Asbestos hides in pipe wrap, floor tile, and attic insulation in homes built before the 1980s.
- Leave bathroom exhaust fans running 20 to 30 minutes after showers to pull out moisture.
- Mold can begin growing on wet building materials within 24 to 48 hours.
- Vacuum with a sealed HEPA filter at least weekly to trap particles down to 0.3 microns.
- Cross-ventilation with windows open on opposite sides exchanges air faster than a single open window.
Table of Contents
- Why Older Homes Trap More Pollutants
- 10 Ways to Reduce Pollution at Home
- How to Improve Air Quality in Home Without Air Purifier
- How to Test the Air Quality in Your Home for Mold
- How Many Hours a Day to Run an Air Purifier
- Moisture, Mold, and Water-Intrusion Troubleshooting
- Book an Indoor Air Quality Assessment
- Frequently Asked Questions
Why Older Homes Trap More Pollutants
Older homes were built before anyone worried much about indoor air quality. That is the core problem. Sealed windows, undersized ducts, and materials that have been off-gassing for decades all work against you. Tight envelopes can hold pollutants in, and outdated ventilation can fail to let them out. Improving indoor air quality in older homes starts with understanding why the building works against you. Below, you will find practical steps to address it.
Legacy Hazards: Asbestos, Lead, and Old Ductwork
Asbestos and lead are hazards worth understanding in older homes. Asbestos hides in pipe wrap, floor tile, and attic insulation in homes built before the 1980s. Lead paint sits under layers of newer paint on trim and doors. Old ductwork can also carry dust and mold spores through every room. If you are worried about asbestos in your own house, check the 6 common places asbestos is found in homes before any renovation. Disturbing these materials is the real risk. Leave them sealed or hire a pro.
10 Ways to Reduce Pollution at Home
Source control beats everything else. Stop pollutants at the source, then ventilate, then filter. That order matters, and skipping it wastes money. In older homes, the source-control step carries extra weight because legacy materials, leaky ducts, and unsealed penetrations keep reintroducing pollutants that filtration alone cannot outrun. Here are ten practical steps, ranked roughly by impact per dollar:
- Ban smoking indoors and near windows. Secondhand smoke particles are small enough to bypass most media filters and settle into soft furnishings. Designate an outdoor smoking area away from doors and window intakes.
- Run the kitchen range hood every time you cook. Gas stoves release nitrogen dioxide and carbon monoxide; electric coil and induction cooktops still produce fine particulate matter from cooking oils. A hood that vents outdoors is the only reliable capture method, recirculating hoods with charcoal filters remove odors but not combustion gases.
- Run bathroom exhaust fans during and after showers. Leave the fan running 20 to 30 minutes after you finish to pull moisture out before it condenses on framing and drywall. In older homes with no fan, a window cracked during and after showers is the fallback.
- Switch to low-VOC, fragrance-free cleaning products. Fragrance compounds and volatile organic compounds react with indoor ozone to form secondary pollutants. Look for products labeled “fragrance-free” rather than “unscented,” which can still contain masking agents.
- Vacuum with a HEPA filter at least weekly. A sealed HEPA system traps particles down to 0.3 microns. Older uprights with worn seals and full bags recirculate fine dust; check the gasket and replace bags before they are full.
- Wipe hard-surface flooring with a damp mop. Dry sweeping and dusting lift settled particles back into the air. A damp microfiber mop captures them instead of redistributing them.
- Fix leaks fast to stop moisture and mold. Mold can begin growing on wet building materials within 24 to 48 hours. Dry the area within that window and find the water source, not just the stain.
- Store pesticides, solvents, and paints outside the living space. A detached garage or shed with ventilation keeps off-gassing chemicals out of the breathing zone. If you must store them indoors, use a sealed metal cabinet.
- Change HVAC air filters on schedule. A loaded filter restricts airflow, which can strain the blower and reduce the system’s ability to move air. Check monthly during heavy use and replace according to the manufacturer’s pressure-drop guidance, not just the calendar.
- Open windows when outdoor air is clean. Cross-ventilation, opening windows on opposite sides of the home, exchanges air faster than a single open window. Check local air quality forecasts before opening during pollen season, wildfire smoke events, or high-traffic periods.
Source Control, Ventilation, and Filtration Priorities
Spend your budget in that order. Source control is free or cheap and works best. Ventilation comes next, using exhaust fans and open windows. Filtration, including a HEPA air cleaner, is the last layer. Many homeowners buy an expensive air cleaner first and skip the cheap fixes. That is backwards. Fix the source, move the air, then filter what is left.
For older homes specifically, the priority order looks like this:
- First, seal and separate. Weatherstrip doors, seal gaps around penetrations, and keep pollutants out of the living space. This is the lowest-cost step and the one most often skipped.
- Second, exhaust at the source. Kitchen and bathroom exhaust fans that vent outdoors are the highest-value mechanical upgrade in most older homes. If the home has no ductwork for a range hood, a through-wall or recirculating unit with a high capture rate is the next best option.
- Third, ventilate deliberately. In homes without modern ductwork, radiator-heated, balloon-frame, or naturally ventilated, opening windows on opposite sides and using spot exhaust fans does more than a single central system can.
- Fourth, filter what remains. A standalone HEPA air cleaner in the bedroom and living room is the last layer, not the first. Choose a unit rated for the room’s square footage and check the clean air delivery rate against the particle size you are targeting.
A common pattern in older homes is spending on a portable air cleaner before fixing a backdrafting water heater or a leaky return duct. Fix the building first, then filter.
How to Improve Air Quality in Home Without Air Purifier
You do not need an air purifier to breathe cleaner air. Ventilation and cleaning do most of the work. Try these moves first:
- Open windows on mild days to boost air exchange.
- Run exhaust fans in the kitchen and bathroom.
- Use a HEPA-filtered vacuum on floors and rugs.
- Dust with a damp cloth, not a dry one.
- Keep indoor humidity in check to limit mold and dust mites.
Many older homes lack modern ductwork, so window ventilation and spot exhaust fans matter more. If you want to spot warning signs early, review the 7 warning signs poor air quality is causing your headaches.
How to Test the Air Quality in Your Home for Mold
Mold testing starts with your eyes and nose, not a kit. Look for water stains, musty smells, and bubbling paint. A moisture meter helps you find hidden damp spots behind walls. Professional testing confirms what you suspect and gives you written results. Before you test, it helps to understand the health benefits of indoor air quality testing. A proper test checks spore counts and moisture, not just surface dust. That is how you prove a real problem instead of guessing.
How Many Hours a Day to Run an Air Purifier
Running it regularly on a low setting keeps air moving. Constant low-speed running keeps air moving and catches particles around the clock. Crank it higher during cooking, cleaning, or allergy season. The one rule: change the filter on schedule. A dirty filter stops working and can even add to the problem.
Moisture, Mold, and Water-Intrusion Troubleshooting
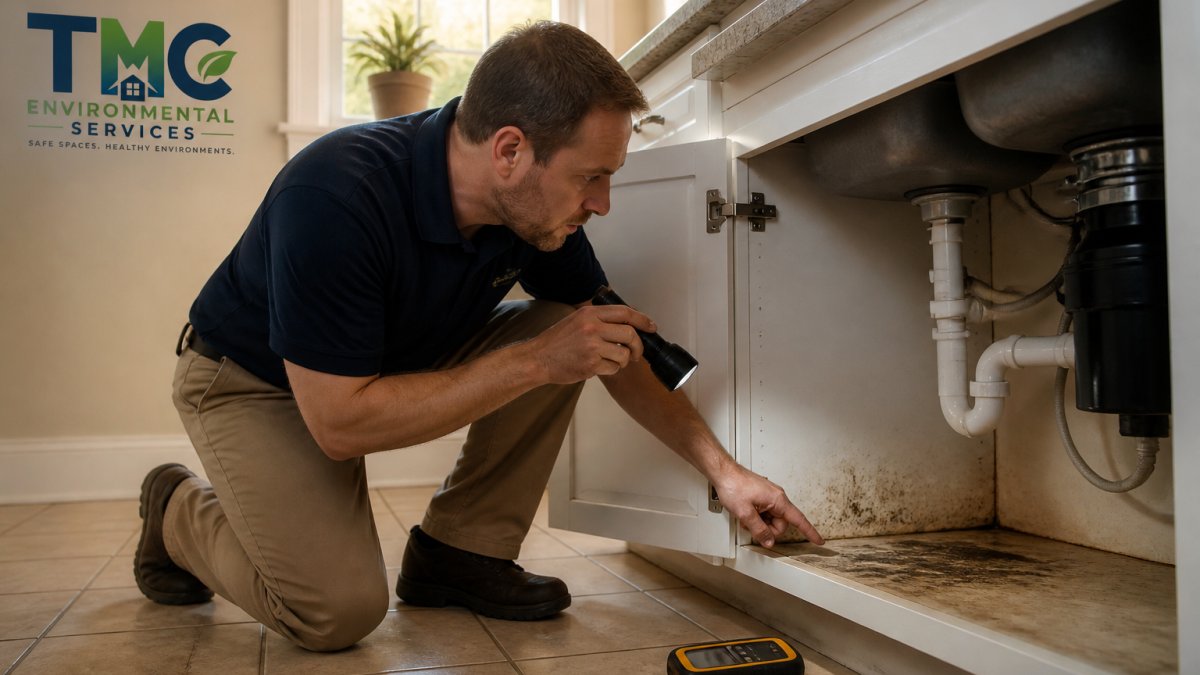
Moisture is the root cause of most mold. Find the water before you treat the mold. Older homes have specific water-entry paths that newer construction does not: unlined crawlspaces, balloon-frame wall cavities that channel water downward, clay or cast-iron drain lines that crack at joints, and single-pane windows that condense heavily in winter. Work through these checks in order.
1. Trace the water source. Check under sinks, around the water heater, and along the base of exterior walls. Look for peeling paint, warped trim, and that musty smell. A moisture meter pinpoints damp spots a flashlight misses.
2. Distinguish a leak from condensation. A leak leaves a concentrated stain that grows; condensation leaves widespread dampness on cold surfaces, especially single-pane windows, uninsulated exterior walls, and cold-water pipes. Condensation problems are solved with insulation, air sealing, and ventilation, not with a bucket.
3. Dry within 24 to 48 hours. Mold can begin growing on wet building materials within that window. Use fans and a dehumidifier, and remove wet carpet or padding rather than trying to dry it in place. Porous materials that stay wet beyond 48 hours are usually a loss.
4. Set a remediation threshold. Larger areas, mold inside wall cavities, mold on structural framing, or any mold in a home with a resident who has asthma or a compromised immune system warrants a professional assessment. Do not use bleach as a substitute for fixing the moisture source; it kills surface mold but does not stop regrowth.
5. Check the hidden paths. Water from a recent leak can linger behind walls even when the surface looks dry. A professional inspection can help trace the source of moisture, not just the symptom.
Watch out: Do not run a dehumidifier in a closed crawlspace without first addressing standing water or active leaks. A dehumidifier pulling moisture from wet soil runs continuously, raises the electric bill, and can mask the real problem. Fix the water entry first, then control humidity.
If water came from a recent leak and everything looks dry, hidden moisture can still linger behind walls, and a professional inspection can help identify it.
Book an Indoor Air Quality Assessment
Some problems need a trained eye and real instruments. If you have health concerns, a recent leak, or a home sale on the line, an assessment gives you clear answers. Professional indoor air quality analysis can help identify hidden moisture intrusion points. The Mold Consultant, LLC offers non-destructive testing solutions. Our team holds CMRS, CR, and CRMI certifications and an A+ accreditation from the BBB. Identifying and addressing hidden moisture can reduce indoor pollutants that affect breathing and support better respiratory health.
Frequently Asked Questions
What are the most common indoor air quality problems in older homes?
Older homes often have asbestos in insulation, lead paint, and aging ductwork that leaks dust. Moisture intrusion feeds mold, and gas appliances or fireplaces release combustion pollutants like carbon monoxide. Poor ventilation traps these contaminants inside. Before you renovate, have a professional indoor air quality assessment to identify legacy hazards and hidden moisture before disturbing materials.
How can I improve air quality at home without an air purifier?
Focus on source control and ventilation. Fix leaks, seal combustion appliances, use kitchen and bathroom exhaust fans, and open windows when outdoor air is clean. Switch to low-VOC, fragrance-free cleaners, vacuum with a HEPA filter, and keep HVAC filters changed. These steps reduce pollutants at the source and often work better than a single purifier in an older home.
How do you test the air quality in your home for mold?
Start with a visual inspection for water stains, musty odors, and visible growth. A professional can perform air and surface sampling to identify mold spores and moisture sources. Testing is especially important after water damage or if occupants have allergy-like symptoms. The Mold Consultant, LLC offers non-destructive mold and air quality testing to confirm the issue and guide remediation.
When should you have an older home tested for mold or asbestos?
Test before any renovation that disturbs building materials, after any water intrusion, or if you notice musty odors or health symptoms. Homes built before the 1980s may contain asbestos in insulation, flooring, or joint compound. A certified inspector can test safely and provide documentation for real estate transactions or insurance claims.
Breathing clean air in an older home comes down to source control, ventilation, and a real moisture fix. If you suspect mold or hidden water damage, guessing costs more than testing. The Mold Consultant, LLC offers mold inspection, air quality testing, and asbestos testing with clear, neutral findings you can act on. Get started with The Mold Consultant, LLC and breathe easier in your older home.
