
Last Updated: November 4, 2026
Quick Summary
To learn how to detect moisture in crawlspaces, run a repeatable inspection with a flashlight, a digital hygrometer, and a wood moisture meter. Scan the soil, vapor barrier, and foundation, then test joists and subfloor and log every reading with its location and date.
- Crawlspace humidity should stay below roughly 60% relative humidity, and lower is better.
- Above 70% relative humidity, act quickly because mold growth is likely.
- Press meter pins along the grain on joists, not into a knot or crack.
- Take readings at the same time of day and note outdoor conditions to build a trend.
- Call a professional when humidity stays above 60% despite a sealed barrier.
Table of Contents
- Why Crawlspace Moisture Goes Unnoticed Until Damage Is Done
- Safety Precautions Before You Enter the Crawl Space
- A Repeatable Crawl Space Inspection Procedure
- Choosing and Using a Wood Moisture Meter on Floor Joists and Subfloor
- What Crawlspace Humidity Levels Are Normal and What Counts as a Problem
- Signs of Crawlspace Mold and What They Tell You About the Source
- Tracking Readings Over Time and Knowing When to Call a Professional
- Frequently Asked Questions
Why Crawlspace Moisture Goes Unnoticed Until Damage Is Done
Crawlspace moisture is water vapor, damp soil, condensation, or leaks trapped in the shallow space under a home, and it stays hidden because almost nobody goes down there.
Why does it go unnoticed for so long? Access hatches are small, the space is dark, and the damage happens slowly. Wood rot and mold can spread for months before you see a single stain.
The Warning Signs Homeowners Walk Past
Your house usually tells you before you see anything. Watch for these signals:
- A musty odor in the lowest rooms or near the floor vents
- Floors that feel soft, bouncy, or uneven underfoot
- Condensation on cold water pipes in summer
- Warped baseboards or doors that suddenly stick
Any one of these is a reason to look below. Two or more is a reason to look this week.
Safety Precautions Before You Enter the Crawl Space
Safety comes before detection, every time. Crawl spaces hold real hazards, and a rushed entry is how people get hurt.
Before you open the hatch, take these steps:
- Tell someone you are going under the house and keep a phone on you
- Wear a respirator rated for mold and dust, plus gloves and knee pads
- Use a bright headlamp and carry a backup flashlight
- Check for standing water and live wiring before you crawl in
The EPA guide to mold and moisture control recommends fixing water problems before they feed mold growth. That starts with knowing what you are walking into.
Watch out: entering a crawl space with standing water near electrical junctions can cause a shock.
A Repeatable Crawl Space Inspection Procedure
A repeatable crawl space inspection procedure is a fixed sequence you run the same way every time, so readings are comparable and nothing gets missed. Random poking around finds nothing.
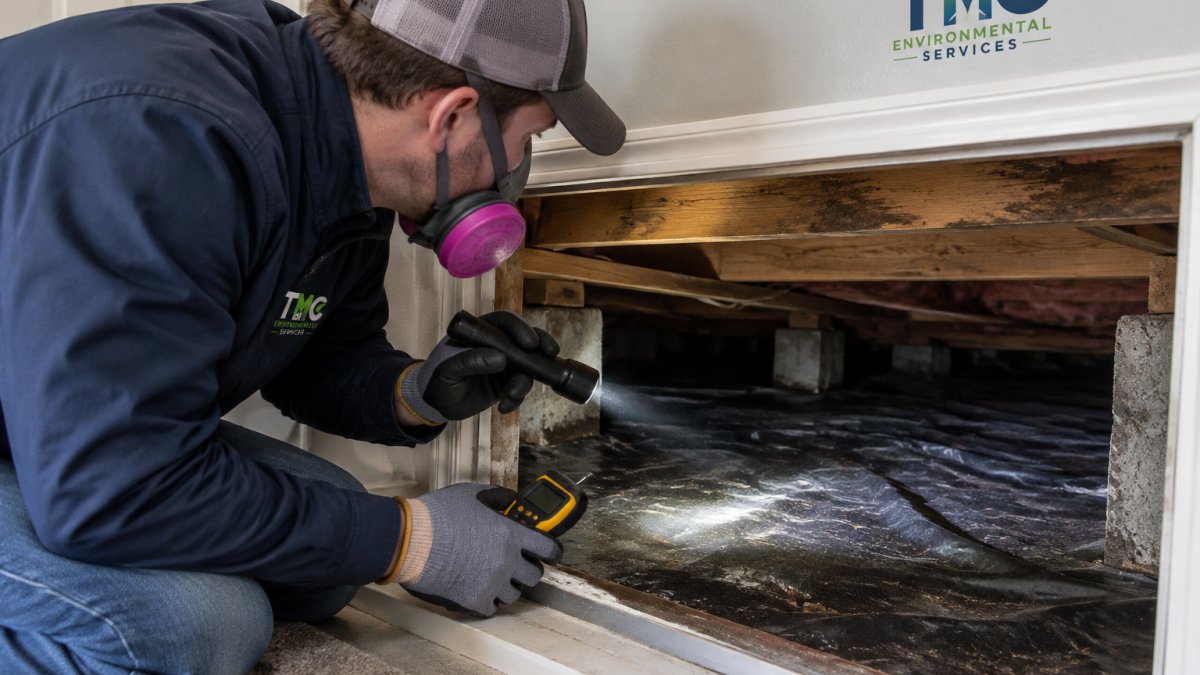
Run the procedure in this order: prepare and stage tools at the hatch, do a visual scan from the opening, check the ground and foundation, measure wood moisture, measure air humidity, then record everything before you leave.
Step 1: Stage Tools and Do a Visual Scan From the Access Hatch
From the hatch, scan the joists, the subfloor above, and the soil below with your light. Look for stains, sagging, white chalky growth, dark patches, and daylight coming through the foundation.
Watch out: a meter with a weak battery or a hygrometer straight out of a hot truck can read wrong, so let the hygrometer sit in the space for several minutes before you log a number.
Step 2: Check the Soil, Vapor Barrier, and Foundation Walls
Examine the ground and the walls next. A proper vapor barrier covers the soil and runs up the foundation walls.
Pay attention to the barrier seams and the perimeter where the plastic meets the wall. Gaps there let soil moisture evaporate straight into the crawl space air. If the barrier is pulled back, note whether the soil underneath is damp, because that tells you whether water is coming up from the ground or running in from outside.
Step 3: Test Structural Wood With a Wood Moisture Meter
A wood moisture meter measures how much water is inside the joists and subfloor. Press the pins or the sensor against the wood and read the number.
On floor joists, press the pins along the grain, not into a knot or a crack. On the subfloor, scan several spots because moisture pools unevenly. Wipe off surface condensation first so you measure the wood, not the water sitting on it.
Step 4: Record Crawlspace Humidity Levels With a Hygrometer
A digital humidity meter, or hygrometer, tells you the relative humidity of the air. Set it in the middle of the space, let it settle, and log the number.
That baseline reading is what you compare next month. A single snapshot can mislead, but a log of readings taken the same way each time reveals whether moisture is seasonal, persistent, or climbing.
Step 5: Record Findings and Take Photos Before You Leave
Before you crawl out, write down every reading with its location, the date, and the weather. Photograph the meter display next to the wood or in the spot where you took the reading, so the number and the location stay linked.
A simple log with columns for date, outdoor conditions, air humidity near soil, air humidity near joists, wood moisture at each test spot, and notes on visual clues is enough.
Choosing and Using a Wood Moisture Meter on Floor Joists and Subfloor
Two meter types exist, and each fits a different job. A pin meter drives two small pins into the wood and reads moisture at that exact point. A pinless meter presses a sensor pad against the surface and scans a wider area without leaving holes.
| Meter Type | Best For | Watch Out For |
|---|---|---|
| Pin meter | Pinpointing a leak at a specific joist | Leaves small holes; pins bend easily |
| Pinless meter | Fast scans across subfloor and joists | Surface moisture can skew the reading |
On floor joists, press the pins along the grain, not into a knot or a crack. On the subfloor, scan several spots because moisture pools unevenly. Wipe off surface condensation first so you measure the wood, not the water sitting on it.
If you want a systematic way to trace the source once you find a wet reading, our guide on how to find the mold root cause walks through a seven-step moisture hunt.
What Crawlspace Humidity Levels Are Normal and What Counts as a Problem
Crawlspace humidity levels should stay below roughly 60% relative humidity, and lower is better. Above that, mold and wood rot find the conditions they need.
Here is how to read your numbers:
- Under 55%: normal, keep monitoring
- 55% to 60%: borderline, find out why it is climbing
- Above 60%: a problem, look for the source now
- Above 70%: act quickly, mold growth is likely
Wood moisture content tells a similar story. Dry structural wood typically sits in the low teens. Wood that reads well above that, especially in one spot, points to active water intrusion rather than humid air.
Why the Same Reading Can Mean Different Things
Relative humidity is temperature-dependent (NOAA’s National Weather Service).
A common pattern is for humidity to climb after heavy rain, during humid summer weather, or when outdoor air is drawn into the space. It may fall in dry winter air.
Wood moisture readings have their own limits. Pin meters read only at the pins, so a dry reading between two wet spots can hide a problem.
How to Tell Normal Variation From a Real Problem
The difference between normal variation and a real problem usually shows up in the pattern, not the single number. Normal variation moves with the weather and returns toward baseline.
Look for these patterns:
- Readings that track the weather and fall when conditions dry out: usually normal variation
- Readings that stay above 60% for weeks despite dry outdoor weather: a persistent source
- One wood test spot that reads high while nearby spots read low: a local leak or intrusion point
- Humidity that climbs after every rain: drainage or groundwater entry
- Condensation on pipes or ducts while wood stays dry: humid air, not a leak
The U.S. Department of Energy guidance on moisture control notes that controlling moisture is the first defense against mold and structural damage, which is why the pattern over time matters more than any one reading.
A Simple Way to Compare Readings Over Time
Keep a log with the date, outdoor temperature and humidity, crawl space air humidity near the soil and near the joists, wood moisture at each test spot, and notes on visual clues. Take readings at the same time of day when you can. After a few visits, the log shows whether moisture is seasonal, persistent, or climbing, and that pattern is what tells you whether to keep monitoring or start tracing a source.
Signs of Crawlspace Mold and What They Tell You About the Source
Signs of crawlspace mold include white or black patches on joists, a sharp musty smell, and powdery growth on the vapor barrier. Each sign hints at where the water is coming from.
- White chalky growth on joists: often condensation from humid air
- Black or green patches near the foundation: usually water intrusion from outside
- Mold on the vapor barrier top: damp soil underneath or pooled water
- Growth under bathrooms or kitchens: a slow plumbing leak
Mold does not grow without moisture. So the pattern of growth is a map to the source. If you spot warning signs and want a checklist to confirm them, review these signs of hidden mold growth.
Tracking Readings Over Time and Knowing When to Call a Professional
One reading is a snapshot. Repeated readings tell the story. Log humidity and wood moisture every month, plus after heavy rain, and compare.
Consider calling a professional when you see:
- Humidity that stays above 60% despite a sealed barrier
- Wood moisture that climbs between visits
- Standing water you cannot trace to a source
- Mold growth that returns after cleaning
- Any soft or crumbling structural wood
A visual inspection alone misses hidden moisture, which is why we explain why visual mold inspections are insufficient before you trust a quick look. When you are ready to hire, know what a professional mold inspection costs and how to prepare for a professional mold inspection so the visit goes smoothly.
Frequently Asked Questions
How do I check moisture levels in my crawlspace?
Start with a visual inspection for standing water, wet soil, and staining on joists. Then push the pins of a wood moisture meter into floor joists and the subfloor, and log each reading. Place a digital hygrometer in the space for 24 hours to capture crawlspace humidity levels. Readings above 20 percent wood moisture content or sustained relative humidity above 60 percent point to a problem worth investigating further.
What is the ideal humidity level for a crawlspace?
Most building scientists and inspectors treat 55 to 60 percent relative humidity as the upper limit for a crawl space. Below that range, wood stays dry enough that mold and wood rot struggle to establish. Above 60 percent for extended periods, condensation forms on cool joists and surfaces, and biological growth becomes likely. A cheap digital humidity meter left in the space for a day gives you a reliable baseline to compare against.
Can I use a standard moisture meter to check crawlspace wood?
Yes. A pin-type wood moisture meter works well on exposed joists, beams, and subfloor, and it is the most affordable option for a homeowner. Pinless meters scan a wider area without leaving holes, which helps when you want to map a whole joist quickly. Whichever type you use, take several readings along each board and compare them, since a single spot can mislead you.
Is it necessary to hire a professional for a crawlspace moisture inspection?
A homeowner can catch obvious problems with a flashlight, a hygrometer, and a wood moisture meter. Professional help makes sense when readings stay high after you have corrected grading and drainage, when you cannot find the source, or when you see widespread staining or fungal growth. A certified inspector can trace water intrusion to its origin and document findings in writing for insurance or real estate transactions.
Moisture you cannot see is the moisture that does the most damage. If your readings keep climbing or mold keeps returning, guessing wastes time and money. The Mold Consultant, LLC brings over a decade of experience, non-destructive testing, and certified inspectors to find the source, not just the symptom. Our team offers mold inspection, air quality testing, and neutral, written findings you can rely on. Get started with The Mold Consultant, LLC and protect your home before the damage spreads.
