
Last Updated: November 5, 2026
Quick Summary
To prevent mold growth in a crawl space, first find and stop the moisture source, then lay a 6-mil vapor barrier over the soil. Keep relative humidity below 60 percent, ideally around 50 to 55 percent, and monitor it with a hygrometer.
- Mold needs water, and most crawl spaces hold more moisture than the house above them.
- Ground vapor, plumbing leaks and surface runoff are the three common moisture sources.
- Keep crawl space relative humidity below 60 percent, aiming for 50 to 55 percent.
- Use a 6-mil or heavier polyethylene vapor barrier, overlapping seams by at least 12 inches.
- Extend downspouts at least 6 feet from the foundation and grade soil to slope away from the house.
Table of Contents
- Why Crawl Spaces Grow Mold: Diagnosing the Moisture Source First
- Step 1: Set Your Humidity Target and Monitor It
- Step 2: Install a Vapor Barrier and Decide Between Encapsulation and Vents
- Step 3: Control Drainage, Standing Water and Plumbing Leaks
- Step 4: Run Dehumidification and Ventilation by Climate, and Avoid Common Mistakes
- How Much Mold Is Acceptable in a Crawl Space and When to Call a Professional
- What Crawl Space Mold Removal Costs and How to Plan Your Next Inspection
- Frequently Asked Questions
Why Crawl Spaces Grow Mold: Diagnosing the Moisture Source First
Mold in a crawl space almost always starts with moisture. Mold needs water to grow, and most crawl spaces hold more moisture than the house above them. EPA guidance on mold and moisture in buildings explains that controlling moisture is the most effective way to prevent mold growth indoors.
Tracing crawl space problems back to their source is the first step in any effective mold prevention plan. Before you buy any product, you need to know where the water is coming from. Learn how to detect moisture in crawlspaces before mold starts to pinpoint the source early.
Common Moisture Sources: Ground Vapor, Leaks and Surface Runoff
Most crawl space moisture comes from three places:
- Ground vapor: Water rises from damp soil into the crawl space air.
- Leaks: Plumbing, water heater, or HVAC condensate lines drip water.
- Surface runoff: Rain and gutter overflow flow toward the foundation and seep in.
Ground vapor is the most common source in many homes. Bare soil releases water into the air all day long. Leaks are often smaller and easier to miss, but they can cause serious damage fast. Surface runoff matters most after heavy rain.
Check the crawl space during dry weather and again after a storm. Look for wet soil, drips, pooled water, and damp insulation.
Step 1: Set Your Humidity Target and Monitor It
Keep crawl space relative humidity below 60 percent. Many practitioners aim for 50 to 55 percent to leave a margin for humid days and sensor error. EPA guidance on mold and moisture in buildings recommends keeping indoor humidity low to limit mold growth, and the same logic applies under the floor.
A single reading tells you almost nothing. What matters is the pattern across days and seasons, so treat monitoring as a small ongoing task rather than a one-time check.
Where to Place the Sensor
- Put the hygrometer in the middle third of the crawl space, not against an exterior wall where surface temperature skews readings.
- Mount it 2 to 3 feet above the vapor barrier or soil, roughly at joist height, so it samples the air the wood actually sees.
- Keep it out of direct contact with the barrier, standing water, and HVAC supply ducts.
- If the crawl space is large or divided by piers, use two sensors, one on the windward side and one near the lowest point where water collects.
- Log the outdoor temperature and humidity at the same time so you can tell whether a spike came from outside air or from the ground.
Reading the Numbers
- Readings above 60 percent for several consecutive days raise mold risk, especially when wood surface temperatures are cooler than the air.
- Readings that jump within a day of rain point to surface runoff or foundation seepage.
- Steady high readings in dry weather point to ground vapor or a slow plumbing leak.
- A wide gap between the crawl space and the living space above suggests a duct leak or a missing air barrier at the floor.
Track the Seasons, Not Just the Week
Most crawl space mold problems are seasonal. Humidity often peaks in late summer, when warm outdoor air carries moisture and condenses on cooler foundation walls and joists. Spring brings snowmelt and heavy rain that raise groundwater.
A practical routine is to record readings once a week for the first month, then twice a month, and to add a reading after every heavy rain and every plumbing repair.
Watch out: if a hygrometer reads low in a visibly damp crawl space, it may be misplaced or out of calibration, so cross-check it against a second unit.
Step 2: Install a Vapor Barrier and Decide Between Encapsulation and Vents
A vapor barrier is heavy plastic sheeting laid over the bare soil. It blocks ground vapor from rising into the crawl space air.
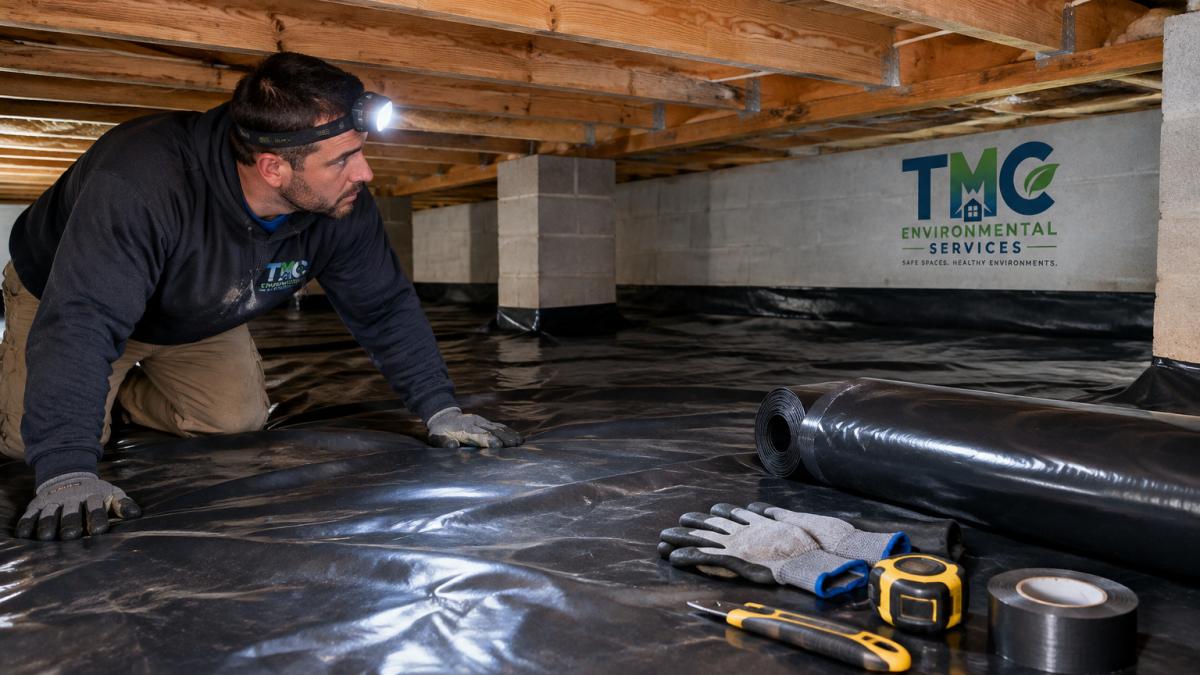
Follow these steps when you install one:
- Clear debris, sharp rocks, and old wood from the floor.
- Roll out a thick, 6-mil or heavier polyethylene sheet.
- Overlap seams by at least 12 inches and tape them.
- Run the barrier up the foundation walls by a few inches and tape it.
- Seal around pipes and posts.
!A homeowner in work gloves and a headlamp inspecting a dry, clean crawl space with a heavy black vapor barrier laid over the dirt floor and joist framing visible above. The homeowner is American.
You have two main options after the barrier is down:
- Encapsulation: Seal the vents, cover the walls, and treat the crawl space as part of the conditioned home. It works well in humid climates.
- Vented crawl space: Keep the vents open and rely on airflow. This works better in dry climates, but it can fail in humid summers.
Both approaches can work. The right choice depends on your climate and the condition of your crawl space.
Step 3: Control Drainage, Standing Water and Plumbing Leaks
Standing water is a direct invitation for mold. Stop it before it starts.
- Extend downspouts at least 6 feet from the foundation.
- Grade soil so it slopes away from the house.
- Clean gutters twice a year.
- Install a sump pump if water pools after heavy rain.
- Inspect water heaters, washers, and supply lines for drips every few months.
Watch out: a small plumbing drip can stay hidden for months while it soaks wood and insulation. Check the crawl space after any plumbing repair.
Step 4: Run Dehumidification and Ventilation by Climate, and Avoid Common Mistakes
A dehumidifier pulls moisture out of the air. Choose a unit rated for the cubic footage of the crawl space, not the square footage of the house, and set it to hold near 55 percent relative humidity.
Ventilation is where most homeowners get into trouble. Moving air helps only when the incoming air is drier than the crawl space air. In a humid summer, opening vents pulls warm, moisture-laden outdoor air into a cooler space, where it condenses on joists and foundation walls.
Choose the Approach That Fits the Space
- Sealed and encapsulated with a dehumidifier: Best where summers are humid and the crawl space is part of the conditioned envelope. Vents are closed, the barrier runs up the walls, and the dehumidifier holds the target.
- Vented with a ground barrier: Workable in dry climates where outdoor air is usually below the target. The barrier still matters because ground vapor is independent of outdoor humidity.
- Sealed without mechanical drying: Only reliable when the barrier is complete and air leakage from the house is controlled. Otherwise humidity creeps back up.
Size and Operate the Dehumidifier Correctly
Match the unit’s pint-per-day rating to the crawl space volume and the dampness of the site. A tight, well-sealed space needs less capacity than a leaky one. Route the condensate drain to a sump or outside rather than relying on a bucket, and check the drain line for clogs each season. A dehumidifier that trips a GFCI or runs on an extension cord is a fire and shock risk; have a qualified electrician confirm the circuit.
Common Mistakes That Undo the Work
- Covering the barrier with a single small tarp that leaves seams open
- Ignoring the hygrometer after the first week
- Sealing vents in a crawl space that still has ground moisture or an active leak
- Running a dehumidifier without draining it or checking its water bucket
- Venting a humid crawl space in summer and calling it airflow
A combination of barrier, drainage fixes, and monitored humidity generally works better than any single product. Sequence matters: stop the water source first, then seal the ground, then control air, then dry mechanically. Doing those steps out of order is the most common reason a crawl space stays damp after a repair.
The table below summarises the three climate-based approaches to crawl space humidity control described in this step.
| Approach | Best for | Key difference |
|---|---|---|
| Sealed and encapsulated with a dehumidifier | Humid summers | Vents closed, barrier runs up walls |
| Vented with a ground barrier | Dry climates | Outdoor air usually below the target |
| Sealed without mechanical drying | Tight, well-sealed spaces | Only reliable with complete barrier and controlled air leakage |
How Much Mold Is Acceptable in a Crawl Space and When to Call a Professional
There is no safe amount of visible mold. Small patches of mold on wood can sometimes be cleaned by a homeowner. Large areas, mold that returns, or mold near the living space need a professional.
Call a professional if you see mold covering more than about 10 square feet, if you notice a musty smell upstairs, or if anyone in the home has breathing problems. CDC information on mold and health describes the health effects of indoor mold exposure.
Professional testing can confirm the type of mold and locate hidden growth. The Mold Consultant, LLC offers mold inspection and air quality testing for homes in the Oklahoma City metro area. You can review options on the mold inspection service page.
What Crawl Space Mold Removal Costs and How to Plan Your Next Inspection
Removal cost depends on how much mold is present and how deep it reaches. Pricing depends on the scope of work, so request a written estimate before work starts.
Plan your next inspection around the seasons. Use the cost of a professional mold inspection guide to budget for the visit.
Check current prices on The Mold Consultant, LLC website or request a quote directly. Read the guide on finding hidden moisture in walls if you suspect water is coming through the foundation or wall cavities.
Frequently Asked Questions
Is it common to have mold in a crawl space?
Yes, it is common. Crawl spaces sit close to damp soil, have limited airflow, and often hold plumbing and ducts that can leak or sweat. When relative humidity stays above roughly 60 percent for extended periods, mold can colonize wood joists, subfloors and insulation. Many homes have some growth at some point, especially after heavy rain or flooding. Regular checks with a flashlight and a humidity reading help you catch problems early, before musty odors or wood staining appear.
Does a crawl space vapor barrier help prevent mold?
A properly installed vapor barrier is one of the most effective ways to prevent mold growth in crawl spaces because it blocks moisture rising from the ground. Use a durable, sealed sheet of at least 6-mil polyethylene or a reinforced product, lapping seams and sealing it to the foundation walls and piers. A vapor barrier works best combined with drainage control and humidity management. On its own, a torn or unsealed sheet provides little protection, so inspect it after storms and seasonal changes.
Should a crawl space be vented or encapsulated to prevent mold?
The answer depends on your climate and crawl space design. Traditional vented crawl spaces rely on outside air, which can add humidity in humid summers and fail to dry the space in winter. Encapsulation seals the space with a vapor barrier, wall insulation and a dehumidifier, and is generally more effective in humid regions. In dry climates, well-functioning vents may be adequate. Whichever you choose, the goal is to keep the space dry and monitored, and to avoid mixing the two approaches without a plan.
When should you call a professional about crawl space mold?
Call a professional if you see visible growth over a large area, notice persistent musty odors, find soft or rotting wood, or suspect mold after flooding or a large leak. Certified inspectors can identify the moisture source, take samples when needed, and recommend a remediation scope. Do not disturb heavy growth yourself without protective equipment, since disturbing spores can spread contamination into living areas. A professional inspection also helps verify that fixes worked after cleanup.
Keep your crawl space dry, check it often, and act quickly when you spot trouble. Contact The Mold Consultant, LLC to schedule an inspection and get a clear plan for your home.
