
Last Updated: November 1, 2026
Quick Summary
To prepare for a mold inspection, gather your leak, flood, and repair records, note musty smells and symptoms by room, and clear access to the attic, crawlspace, HVAC, and utility closets. Leave visible mold untouched, move furniture 1-2 feet from suspect walls, and secure pets before the inspector arrives.
- Start gathering paperwork and noting symptoms about one week before the inspection.
- Don’t clean, paint over, or remove visible mold before the inspector arrives.
- Turn off the HVAC only if the inspector requests it, and only for the window specified.
- A typical mold inspection takes one to three hours for an average home.
- Ask whether the inspector is independent from any remediation company before booking.
Table of Contents
- Why Preparation Changes What a Mold Inspection Finds
- Your Mold Inspection Checklist, Organized by Time
- What Not to Clean, Move, or Conceal Before the Inspector Arrives
- What to Expect During a Mold Inspection
- How Long Does a Mold Inspection Take?
- Questions to Ask a Mold Inspector Before and After the Visit
- Book Your Mold Inspection with The Mold Consultant, LLC
- Frequently Asked Questions
Why Preparation Changes What a Mold Inspection Finds
Most homeowners think of a mold inspection as something done to them. In reality, an inspection is a partnership, and the homeowner’s half of the work starts before the inspector ever pulls into the driveway.
Here’s the core problem: mold hides. Learning the signs of mold behind drywall after a leak lets you point the inspector to suspect areas. Knowing the signs of mold after water damage helps you prepare the right areas and information for the inspector.
At The Mold Consultant, LLC, we focus on tracing hidden moisture intrusion across homes and commercial buildings. The best inspections happen when homeowners leave things alone and document what they’ve seen.
Your Mold Inspection Checklist, Organized by Time
A good mold inspection checklist is less about scrubbing and more about gathering. Think of yourself as a witness, not a cleaner. The goal is to hand the inspector a complete story of your home’s moisture history, and to make sure they can physically reach every area that story points to.
Use this timeline to stay organized. It takes the guesswork out of the days before the visit and the morning of.
| Timing | Task | Why It Matters |
|---|---|---|
| One week before | Gather leak, flood, and repair records | Gives the inspector a moisture history to target |
| One week before | Note symptoms and musty smells by room | Points to problem areas before sampling |
| One week before | Confirm access to attic, crawlspace, HVAC, and utility closets | Lets the inspector reach concealed spaces |
| One week before | Ask the inspector about HVAC settings and sampling prep | Avoids rescheduling or invalid samples |
| Day before | Move furniture 1-2 feet from suspect walls | Exposes baseboards and drywall for visual inspection |
| Day before | Clear stored items from access hatches and crawlspace entries | Prevents delays and unsafe ladder work |
| Day before | Confirm pets are secured off-site or in a closed room | Keeps the visit safe and on schedule |
| Morning of | Turn off the HVAC only if the inspector requests it | Improves air sampling accuracy when required |
| Morning of | Have your written questions and records ready | You get clear answers before the inspector leaves |
One Week Before the Inspection
Start with paperwork and memory. Write down every leak, drip, flood, or repair you can recall, even ones from years ago.
Walk each room and jot down what you notice: musty odors, discolored patches, peeling paint, or warped baseboards. Don’t scrub anything yet.
Next, plan for access. The inspector needs to reach the attic, crawlspace, HVAC system, and any utility closets or mechanical rooms. Clear a path to each.
Finally, call or email the inspector’s office with two questions: Do you want the HVAC system running or off before air sampling? And are there any areas you specifically need cleared? A common pattern is that inspectors want the HVAC off for a short period before air sampling, but the exact window varies by protocol.
The Day Before and the Morning Of
The day before, pull furniture a foot or two away from walls in any room where you suspect a problem. This exposes baseboards and drywall for a visual inspection and gives the inspector room to run a moisture meter along the bottom plate.
Clear stored items away from attic hatches, crawlspace entries, and electrical panels. If the inspector needs to climb a ladder or kneel in a crawlspace, a cluttered landing zone turns a 10-minute check into a 30-minute delay.
Secure pets in a separate room or off-site. An inspector carrying equipment and climbing ladders doesn’t need a curious dog underfoot.
On the morning of, turn off the HVAC system only if the inspector requested it, and only for the window they specified.
Keep a simple one-page log taped to the fridge: date, room, what you saw or smelled, and whether it was wet or dry. Hand it to the inspector at the door. It takes five minutes to make and often saves an hour of guessing.
What Not to Clean, Move, or Conceal Before the Inspector Arrives
This is the part most guides get wrong. The instinct to tidy up is strong, but cleaning can destroy the evidence an inspector needs.
Leave visible mold exactly where it is. Don’t paint over stains. Don’t caulk a suspect seam.
Don’t conceal anything either. To see how inspectors trace mold back to its source, read how to find the source of mold in your house.
What to Expect During a Mold Inspection
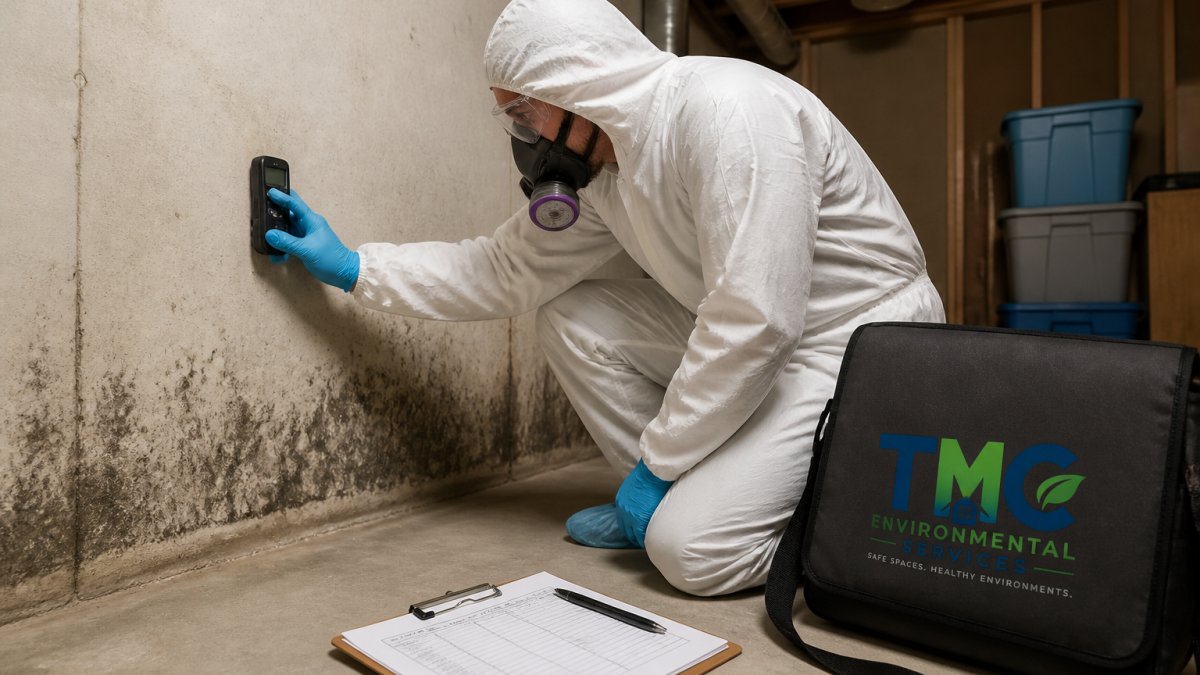
A professional mold inspection is a structured, non-destructive process. The inspector starts with a visual inspection of the whole property, then uses tools to confirm what the eyes can’t see.
Most visits follow a similar sequence:
- Walkthrough and interview. The inspector asks about leaks, symptoms, and repairs, then tours the home. Your records and photos shorten this step and sharpen the focus.
- Visual inspection. They check walls, ceilings, floors, attic, crawlspace, and HVAC for mold growth and water damage, including areas you may never look at, behind the washing machine, under the kitchen sink, around the water heater pan.
- Moisture readings. Moisture readings can help identify damp areas that look dry. Inspections can also look for water intrusion points around windows, roofs, plumbing, and foundations.
- Sampling decisions. The inspector decides whether air sampling, surface sampling, or both are warranted, and explains why. This is a judgment call, not a standard add-on, a good inspector will tell you what each sample is meant to prove.
- Documentation. Findings, photos, moisture readings, and sample locations are recorded for the report.
How Sampling Decisions Are Made
Sampling is not automatic. Sampling is typically considered when visible growth cannot be identified, when occupants report symptoms, or when a real estate transaction or remediation verification calls for baseline data.
Ask the inspector before they leave: Which areas did you sample, and what will each result tell us? If they cannot explain the rationale, the samples may not be worth the cost.
What the Report Should Contain
A useful inspection report is more than a stack of photos. Look for:
- A summary of findings by area, with photos and moisture readings
- The identified or suspected moisture source, not just the mold location
- Sample locations, lab results, and interpretation of those results
- A clear distinction between what was confirmed and what is suspected
- Recommended next steps: drying, repair, remediation, or further evaluation
Ask when the report will arrive and in what format.
What Happens After the Inspection
The visit is the beginning, not the end. If the report identifies a moisture source, the fix is usually a plumbing, roofing, drainage, or ventilation repair, not a cleaning product. Remediation, if needed, is a separate scope of work, and an independent inspector should not be the same company selling that work.
To understand what that report actually contains, see what a mold inspection report shows before the visit so you know what you’ll receive and what to ask for.
Before the inspector leaves, confirm three things: which areas were sampled and why, when the report will arrive, and who to call if the results point to a repair. Those three answers turn an inspection into an action plan.
How Long Does a Mold Inspection Take?
A typical mold inspection takes between one and three hours for an average home, depending on size and complexity. A small condo with one suspect area may wrap in about an hour. A large house with a crawlspace, attic, and multiple sampling locations can run three hours or more.
Several factors push the time up:
- Square footage and number of floors
- Whether attic and crawlspace access is easy
- The number of samples requested
- How many areas show moisture or visible growth
Questions to Ask a Mold Inspector Before and After the Visit
The right questions separate a thorough inspection from a quick look. Ask these before you book:
- Are you independent from any remediation company? A neutral inspector has no incentive to sell you cleanup work.
- What certifications do you hold? Look for credentials like CRMI or CMRS, and verify them with the issuing organization.
- Will you use moisture readings and lab analysis, or just a visual inspection?
- What does the report include, and how soon will I get it?
After the visit, ask:
- What is the moisture source, and how do we fix it?
- Which areas tested positive, and at what levels?
- What are the next steps, and do we need remediation or just drying?
An inspector who can’t answer these clearly is worth replacing. Independence and clear documentation matter more than a low price.
Book Your Mold Inspection with The Mold Consultant, LLC
Preparation is half the battle. The other half is choosing an inspector who will actually find the root cause instead of just treating the symptom.
At The Mold Consultant, LLC, we’re locally owned and have over 10 years of experience. Our team holds certifications including Certified Residential Mold Inspector (CRMI), Certified Microbial Remediation Supervisor (CMRS), and Certified Restorer (CR), and we hold an A+ accreditation from the BBB. We use non-destructive testing to identify hidden moisture intrusion points, and we offer neutral mediation so our findings hold up in disputes. Veterans, teachers, and first responders are eligible for discounts on our services.
If you’re weighing the investment, review our mold inspection pricing guide before you book so there are no surprises.
Frequently Asked Questions
Should I clean or remove suspected mold before a mold inspection?
No. Cleaning or wiping away visible mold before a mold inspection removes the evidence an inspector needs to confirm growth, identify the mold type, and trace it back to a moisture source. Leave visible growth untouched, avoid running fans or dehumidifiers in the affected area, and do not paint over or seal stained surfaces. The inspector can still take surface samples and moisture readings, but the assessment is more accurate when the site is left as found.
What should I tell a mold inspector about past leaks or water damage?
Share everything you know, even if the issue looks resolved. Note when the leak started, what caused it, how it was dried out, and whether any repairs were made. If materials were wet for more than 48 hours, say so, since that window is when mold growth typically begins. Mention prior remediation, insurance claims, and any musty odors or health symptoms you have noticed. This history helps the inspector focus moisture readings on the areas most likely to still be damp.
Do I need to move furniture before a mold inspection?
You do not need to empty rooms, but clear access matters. Pull furniture a few feet away from exterior walls, especially in basements and bedrooms, so the inspector can reach baseboards and check for moisture. Clear a path to the attic hatch, crawlspace door, HVAC unit, and water heater. Leave stored boxes in place unless they block access to a wall or closet the inspector needs to examine. Confirm any locked doors or crawlspace hatches are unlocked before the visit.
Is mold testing worth it if I cannot see any mold?
It can be, especially after water damage or a known leak. Mold often grows inside wall cavities, under flooring, or in attic insulation before it is visible. Moisture readings and sampling can help identify damp materials and confirm what is present. Testing gives you documented results you can use for insurance claims, real estate transactions, or tenant disputes. Ask the inspector upfront which sampling methods they use and how results will be interpreted.
Mold doesn’t wait, and neither should you. If you’ve had water damage, notice a musty smell, or just want peace of mind, get ahead of the problem. Get started with The Mold Consultant, LLC and schedule a professional mold inspection that pinpoints the source, protects your health, and gives you a clear plan forward.
