
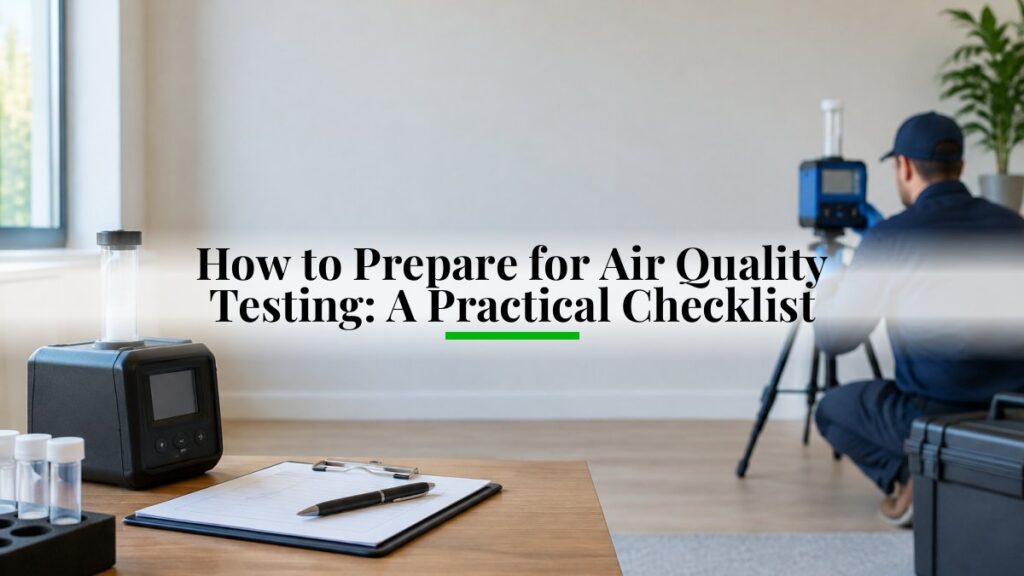
Last Updated: November 8, 2026
Quick Summary
To prepare for air quality testing, keep your home in normal living conditions: run the HVAC on its usual schedule, close windows and exterior doors for at least 12 hours before a professional visit, and pause deep cleaning, painting, aerosols, and candles for 24 to 48 hours. Document recent leaks, odors, renovations, and symptoms with dates so the inspector knows where to sample.
- Close windows and exterior doors at least 12 hours before a professional sampling visit.
- Pause painting, aerosols, candles, and incense for 24 to 48 hours before sampling.
- Run the HVAC system on its normal schedule and avoid switching to special modes.
- Place monitors 3 to 5 feet off the floor, away from vents, doors, and windows.
- Write down leaks, water damage, renovations, and symptoms with dates before testing.
Table of Contents
- What an Indoor Air Quality Test Measures and Why Preparation Matters
- Choosing a Professional Home Air Quality Test or a DIY Kit
- Pre-Test Checklist for Each Testing Method
- Controlling HVAC, Cleaning and Activities Before Sampling
- Documenting Symptoms, Building History and Suspected Sources
- How Long Indoor Air Quality Testing Takes and What Can Skew Results
- Booking Your Air Quality Test and Reviewing Results
- Frequently Asked Questions
What an Indoor Air Quality Test Measures and Why Preparation Matters
An indoor air quality test checks the air inside your home for pollutants like mold spores, dust, volatile organic compounds (VOCs), carbon dioxide, and humidity.
Think of preparation as setting the stage. The air you test should be the air you normally breathe. That means controlling a few variables first, such as the HVAC system, cleaning habits, and recent activities.
- Test results reflect conditions at the moment of sampling
- Recent cleaning or painting can temporarily change readings
- Windows, doors, and ventilation settings affect outside air exchange
Choosing a Professional Home Air Quality Test or a DIY Kit
You have two main options: a professional home air quality test or a DIY test kit. Each has trade-offs in cost, depth, and reliability. A DIY kit gives you a quick snapshot, but it often tests fewer pollutants and relies on your own sample collection.
For a health concern or a dispute, a professional sample is generally the stronger choice. For a general check on humidity or carbon dioxide levels, a monitor may be enough. Current pricing is available on The Mold Consultant, LLC’s pricing page on our website.
- DIY kit: Lower cost, quick results, fewer pollutants tested
- Professional test: Lab analysis, trained sampling, documented chain of custody
- Monitor: Good for continuous tracking of humidity, CO2, and particles
If you are preparing a property for a formal assessment, our Commercial Property Air Quality Assessment Requirements guide explains what formal testing usually involves. Homeowners weighing professional options may also find the value of testing worth reviewing first, and our Is Air Quality Testing Worth It? A Homeowner’s Guide covers that decision in more detail.
Pre-Test Checklist for Each Testing Method
Preparation is not one routine. A monitor reading, a DIY kit, and a professional sampling visit each fail in different ways, so use the checklist that matches your method. The goal in every case is the same: capture the air you normally breathe, not the air created by test-day activity.
Before a Professional Sampling Visit
- Confirm the scope in writing: which pollutants, which rooms, and whether the visit includes a visual inspection, moisture readings, or lab analysis.
- Close windows and exterior doors for at least 12 hours before the visit unless the inspector tells you otherwise. Ask the inspector to confirm this window, because some protocols call for shorter closure.
- Run the HVAC system on its normal schedule. Do not switch to fan-only, do not seal vents, and do not change the filter on the morning of the visit unless it is visibly clogged.
- Move laundry, boxes, and stored items at least a few feet away from exterior walls and supply/return vents in the rooms being sampled. For a full walkthrough of getting your home ready, see How to Prepare for a Professional Mold Inspection.
Watch out: sealing the house for days or running an air purifier on high right before a visit can make a problem room look clean and send the inspector to the wrong location.
Before a Monitor Reading
- Place the monitor 3 to 5 feet off the floor, at breathing height, in the room you actually want to know about (the EPA).
- Keep it at least a few feet from supply and return vents, exterior doors, windows, direct sunlight, space heaters, and the kitchen range.
- Let the device acclimate in the room for at least a few hours, and longer if the manufacturer specifies a warm-up period. Follow the manufacturer’s calibration and warm-up instructions exactly.
- Log the start time, room, HVAC setting, occupancy, and any nearby activity such as cooking or cleaning.
Before a DIY Kit
- Read the entire instruction sheet before opening any sampler. Many kits have a fixed sampling window and cannot be paused.
- Check the kit’s expiration date and storage conditions. A kit stored in a hot garage or past its date may not be reliable.
- Follow the kit’s own closure and placement rules rather than a generic rule of thumb. Some kits want windows closed; others want normal ventilation.
- Record the sampler location, start and stop times, indoor temperature and humidity, and outdoor conditions.
A Printable Pre-Test Checklist
Use this as a single page before any method:
- Method chosen and scope confirmed in writing
- Windows and exterior doors closed for the required period
- HVAC running on its normal schedule
- Filter checked; replaced only if clogged
If you are preparing a property for a formal assessment, our Commercial Property Air Quality Assessment Requirements guide explains what formal testing usually involves.
The checklist below summarises what to do before each testing method, so you can match your preparation to the method you have chosen.
| Method | Key preparation step | Timing or distance |
|---|---|---|
| Professional sampling visit | Close windows and exterior doors | At least 12 hours before visit |
| Professional sampling visit | Pause deep cleaning, painting, aerosols, candles | 24 to 48 hours before sampling |
| Monitor reading | Place device at breathing height | 3 to 5 feet off the floor |
| Monitor reading | Keep away from vents, doors, windows | At least a few feet |
| Monitor reading | Let device acclimate in the room | At least a few hours |
| DIY kit | Follow kit’s own closure and placement rules | Per the instruction sheet |
| DIY kit | Check expiration date and storage conditions | Before opening the sampler |
Controlling HVAC, Cleaning and Activities Before Sampling
Your HVAC system moves air around the whole house, so its settings matter. To learn more about improving indoor air quality in older homes, read How to Improve Indoor Air Quality in Older Homes.
Pause activities that add pollutants, such as painting, aerosol sprays, candles, incense, and heavy cooking. Ask everyone in the home to keep activity normal and avoid sudden changes.
Documenting Symptoms, Building History and Suspected Sources
Good documentation helps the testing answer the right questions. Write down when symptoms started, which rooms they seem worse in, and whether they improve when you leave the home. Note any past water events, flooding, remodeling, or pest problems, along with their dates.
Also list any suspected sources, such as a damp basement, a leaking appliance, or a new carpet. Bring this list to the inspection, and keep copies for your own records.
How Long Indoor Air Quality Testing Takes and What Can Skew Results
Timing is not one number. It depends on the pollutant, the method, and whether you are screening or diagnosing. Treat a monitor reading or a single DIY kit as a screening tool, and treat lab-based professional sampling as diagnostic only when the sampling plan matches the question you are asking.
Typical Timelines by Method
- Monitor reading: minutes to hours for a live number, but allow a few hours of acclimation and several readings across a normal day before drawing conclusions.
- DIY kit with lab analysis: sampling itself may take minutes to a few hours, and lab turnaround is commonly several business days to a couple of weeks depending on the analyte and the lab.
- Professional sampling visit: the visit itself may take one to several hours depending on the number of rooms and samples, and lab results commonly return in several business days to a couple of weeks.
- Mold sampling: air samples are often paired with surface or moisture readings, and results are usually interpreted alongside a visual inspection rather than as a stand-alone number.
Pollutant-Specific Preparation and Timing
Preparation is not uniform across pollutants, and applying the wrong rule can invalidate a result.
- Mold: keep normal living conditions. Do not run an air purifier on high or wipe surfaces right before sampling, because both can reduce airborne spores and hide the pattern the inspector is looking for. Moisture readings and visual inspection matter as much as the air sample.
- Radon: follow the closed-house conditions specified for the device, typically keeping windows and exterior doors closed and avoiding unusual exhaust fan use for the period the test requires. Normal entry and exit is generally allowed.
- VOCs: avoid painting, new furnishings, aerosols, and solvents for at least 24 to 48 hours before sampling, and note any recent renovation. A sample taken during or right after painting will not represent normal conditions.
- Particulate matter: avoid cooking, vacuuming, burning candles, and opening windows during the sampling window unless the protocol says otherwise. Outdoor smoke or wind can dominate a short sample.
What Can Skew Results
- Recent cleaning, vacuuming, or dusting
- Open windows or doors during sampling
- Fans or air purifiers running at unusual settings
- Recent painting, new furniture, or new carpet
Screening Versus Diagnostic Testing
A screening test tells you whether a closer look is warranted. A diagnostic test is designed to answer a specific question, such as whether a particular room has elevated mold spores compared with outdoors, or whether a combustion appliance is producing CO.
Booking Your Air Quality Test and Reviewing Results
When you book a test, tell the company what you want measured, which rooms are of concern, and any symptoms or history you’ve documented.
When reviewing results, compare indoor readings to outdoor or control samples if they were taken, and focus on patterns rather than a single number. You can find out more about professional testing and booking to see what fits your situation.
Ready to get clear answers about your home’s air? Call The Mold Consultant, LLC today to schedule a professional air quality test in the Oklahoma City metro area.
Frequently Asked Questions
How long should an air quality test take?
Duration depends on the method. A monitor may record readings continuously over a period of hours to days, while a sampling visit typically takes a few hours on site, followed by laboratory analysis. Ask your provider for the expected timeline for each sample type, including whether results come as a preliminary report or a final lab report. Plan for the sampling window to run without major disruptions such as renovation or heavy cleaning.
Should I turn off my HVAC system before an air quality test?
Usually yes, if your provider instructs it. Running the HVAC system can mix air between rooms, pull in outside air, or stir up settled dust, which changes the readings. Some tests require the system to run under normal conditions to reflect typical exposure. Confirm the instruction with your provider before the visit and write down the time you turned the system off or on, since that detail matters when interpreting results.
What should I do before an indoor air quality test?
Keep windows and doors closed for the period your provider specifies, avoid smoking, candles, incense and aerosol sprays, and postpone deep cleaning, vacuuming and painting. Note recent water damage, remodeling or new furnishings, and set up any monitors in the locations your provider recommends. Keep a simple log of activities during the test window, since sudden spikes in particulates or VOCs often trace back to a specific event.
Is indoor air quality testing worth it?
It can be, especially after water damage, visible mold, unexplained musty odors, or when symptoms seem to improve when you leave the home. Testing identifies which pollutants are present and at what levels, which helps you decide whether remediation, ventilation changes or source removal are needed. It will not always find a cause, and a clean result does not rule out every exposure, so pair testing with a visual inspection and a review of your symptoms and building history.
